Saturday, June 30, 2012

Maple Leaf Thank You, RS#18


Here is a thank you card that I created based on the sketch from Retro Sketches. I started with the background paper which is Bo-Bunny's Autumn Wood.  I used the second side of this double-sided paper for the strip.  I used  chocolate brown Core-dinations paper as a mat for the patterned paper. and  punched circles from both papers.  After trimming the Autumn Wood circles with decorative scissors, I adhered them to the chocolate brown paper. I used a punch to create the maple leaves and chalked them to add dimension.  Inspired by the vines on the patterned paper, I used wire and wrapped it around the bottom strip and added the thank you and the maple leaf with the wire bow.This is a fairly simple card that will be perfect for a certain maple syrup producer that I need to thank.
                    
Thank you for visting.

Monday, June 25, 2012

Makeover Monday @ PCL, Gems

Paper Crafter's Library Makeover Monday challenge inspired me to create this card.  Andrea Walford shared her card as well as her inspiration piece from Teri Andreson.  I was inspired by both of the cards. Since I didn't have an abundance of clear gems. I  used several colors.  I liked the way Teri outlined the green leaf with gems, so I outlined the petals of my flower with them.  I also used a variety of patterned papers just as each of these designers did.   
Andrea Walford's card from Paper Crafter's Library


Teri Andreson’s card from A Bit of This, A Bit of That blog


Enjoy the Simple Things


I SPY SKETCHES has a wonderful sketch to work with this week.  When I saw the sketch I immediately thought about the four seasons. So, I punched four squares from white cardstock, added a blue chalked, clouded background and either snow or grass.  On the snow background I added white gel pen snowflakes and a hint of glitter.  On the other three squares, I added leaves or flowers.  I also chalked the white card base with blue chalk, creating clouds so that I could continue the sky theme. I mounted the four squares on green cardstock and used the same cardstock to add four squares on the corners.  I punched small circles around the edges of these squares.  I adhered the four green squares with dimensional squares.  I added a sentiment that I printed on white cardstock and matted with the same green cardsock I'd already used.  I finished it with a green bow.  Thanks for a great sketch and for taking the time to view my blog.  I appreciate it!

Pink Flowers, CFC58

Pink, yes, Pretty in Pink is the challenge over at Cas-ual Fridays.  My card is very simple.  I started with a white card base, punched two flowers from it, then punched the same flower from pink patterned paper.  I adhered the punched out flowers inside the card, lining them up with the punched flower.  I added a darker pink circle for the flower centers.  I finished the card with two horizontal strips cut from the same pink patterned paper.  cfc58
Thanks for visiting!

Sunday, June 24, 2012

Winter Moon

There is a fun challenge over at The Play Date Cafe. It's a color splash challenge.  Can you guess what the colors are for this challenge?
The colors are:  white....black....blue.  I loved the idea of using these colors together so I began with a white card base.  I placed a circle on the cardstock and inked around it with blue ink. To finish it, I simply punched trees from black cardstock and adhered them.  I loved this challenge and how quickly my card came together.


I hope you have had a wonderful weekend. 

 Enjoy the week ahead and thanks for visiting!

Friday, June 22, 2012

Bon Voyage


This is my second card for the sketch challenge over at i Spy Sketches.  The sketch is really fun so I couldn't resist making a second card.  I started by dry embossing two ships on white and dark blue cardstock.  I cut the white ship apart and adhered  the pieces to the blue ship.  I added windows with a marker and a tiny gold flag.  I cut cloud shapes  from cardstock and  inked  around them on white cardstock.  To create the waves, I drew a few waves and cut them from blue cardstock.  I used white and blue ink on the waves  and added the gold sequins.  I mounted  the ship on a blue piece of cardstock that matched the card base, and used a patterned paper behind the ship tag  I hung the Bon Voyage tag from the clouds with a piece of gold string.  
 Thanks for visiting!

Thursday, June 21, 2012

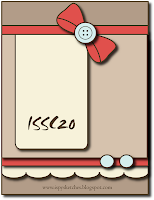
A Warm Hello, ISSC20

Here's my card and the sketch for the sketch challenge over at I Spy Sketches.  To create the mat, I inked white cardstock with blue, turquoise, green and yellow. I used a white correction pen to add writing over the inked mat and scalloped the bottom edge with scissors. I also added blue ink around the tag and turquoise and blue around the outside edges of the card base. I cut the butterfly from white cardstock, added ink and blue punched dots and mounted the inked butterfly on two blue butterflies with dimensional adhesive between them. I shaped wire to create antennae. To finish the card, I added the ribbon, bow and two blue brads.  My sentiment is printed on vellum and backed with blue cardstock.


Thanks so much for stopping by! Hope you enjoyed your visit!


Tuesday, June 19, 2012

Working with Gold Leaf Foil

To create this card for the "Something Shiny" challenge at Less is More. I reached for my Mona Lisa Gold Leaf.  I am just learning how to work with it. I started by dry embossing the design  on black cardstock and then used a  paint brush to apply the Mona Lisa adhesive.  After letting it dry to a tacky state, I applied the gold leaf.  This is a challenging medium for me because it is hard to control and keep the lines clean.  I did okay with this design, but am eager to continue working with the gold leaf to polish my skill.  In addition to the gold leaf, I used foil paper and gold brads.   If  anyone happen to know of any great resources or videos about working with gold leaf, I would really appreciate it if you shared them with me.
Thanks for coming by the blog!


Monday, June 18, 2012

Something Shiny

Hmmm...a  "Shiny" challenge.  Yes, that's right.  Over at Less is More the challenge is to use something shiny.   Since I have a large stash of sequins, I put them to use for the flowers and leaves on the three flowers.  For the stem, I threaded a piece of silver wire through the tiny holes in each red sequin, silver sequin and circle sequin, layering them as I threaded them.  I used pliers to loop the ends of each wire so the sequins wouldn't slip off the wire. To adhere them to the mat, I used  3M dimensional squares.  The black mat is also somewhat shiny.  It is a glittered piece of paper.  I've had it in my stash for a very long time and finally have a use for it.

Thanks for taking a peek at my blog!


"Note"worthy Goals


My Creative Time Sketch

The sketch on the right is from the layout challenge at My Creative Time. It is just so fun and fabulous! When I saw it I was immediately inspired.  I couldn't wait to get started. My son is an avid music lover.  He plays the viola, bass guitar, and acoustic guitar, does a bit with a keyboard and arranges and composes music.  He has a LOT of goals for the summer and most of them are music related.  So, these "Note"worthy Goals were also my inspiration for this layout.  I wanted to include a representation of the instruments that he is using to reach his goals. You could say my layout is sort of an "I SPY" game. Can you find the various instrument parts? I started by creating the keyboard  with strips of black and white cardstock.  I then cut out the black bass guitar shape. I layered these onto the polka dot patterned paper.  Over the top of  the instrument shapes, I adhered a transparency and printed his current musical "arrangement" on it (sorry for the glare from my camera flash).  For the guitar, I used my sewing machine and black cardstock to create a representation of the sound hole on a guitar.  I added wire to represent the strings and foil covered skewers to mount them. The musical notes are made from twine and I mounted the photos on green burlap.  I included the photo of my son at the computer, because he uses a software program when he is arranging or composing  music. The title is embossed and the journaling tag is tucked inside a burlap pocket (on back of layout on the upper left hand side of the page). The journaling tag has a piece of twine attached so that it can be pulled from the pocket.  Phew!  That's a lot of detail on one layout and is one of the "busiest" layouts I have ever created.  

Thanks for visiting!

Sunday, June 17, 2012

Polka Dotted Thank You


I worked on this very bright card for the card sketch challenge at Card Patterns.  I recently purchased this bright yellow Offray polka dotted ribbon.  I was eager to use it and this sketch seemed like the perfect opportunity.  I love the combination of black and yellow so I started with a black card base.  I cut two inch strips of ribbon and folded it,  leaving it "looped" and added a  punched  black circle to each loop. I adhered these ribbon loops to the yellow patterned paper and added a strip of yellow polka dotted  ribbon and narrow black ribbon and a black bow.  I chalked around three edges of a piece of white cardstock and adhered it on the right side of the card.  I punched the flower from black cardstock, added white dots with a gel pen and yellow ribbon leaves.  The banner is made from ribbon, rub ons and black cardstock.

I am so happy you had time to visit my blog. Thanks so much!


Saturday, June 16, 2012

Embossed Floral Card


Here's my card for the Makeover Monday Challenge at Paper Crafter's Library.I was inspired by Tracy   Wegener's and Andrea Walford's cards. I love the white embossed backgrounds on their cards and how they off-set the ribbons. As you can see, I also changed the orientation on my card (only because my card base was already scored for this type of fold).
Tracy Wegener's Card
Andrea Walford's Card

I appreciate your comments and thank you for stopping by my blog.

Friday, June 15, 2012

Turquoise Dragonfly card

There is an a fun sketch challenge at Retro Sketches.  I decided to attempt a card this morning...ahhh...too late.  I didn't make the challenge but I had fun creating this card anyway.  To create my card, I used a turquoise cardstock and stitched around three edges with my sewing machine. The orange shape is based on an insert in a packaged item, which I traced and cut out.  I machine stitched around this and drew dots on it with a gel pen.  I added a turquoise ribbon around the card, rounded the corners of the polka dot paper, adhered it, and added a bow.  I attached three turquoise brads to the top right corner and finished the card by creating a dragonfly.  To create the dragonfly, I drew a sketch on black cardstock, cut out six of them, stacked them and placed dimensional adhesive between the layers. I cut foil wings, adhered them and then used a gel pen to create black dots on the center of the dragonfly body.  Lastly, I made wire antennae and adhered it to the dragonfly head. (The layered dragonfly was inspired by Debbie at Debbie's Designs. She made a gorgeous layered ladybug card.)

Thanks for visiting. 
 Have a wonderful Father's Day weekend!

Tuesday, June 12, 2012

Just to say...CFC56 Sweet Spot

Here's my last card for the Sweet Spots challenge over at Casual Fridays.  This is a very simple card with polka dot patterned paper and a few punched flowers with gems in the center.
                                                                                                          CFC56
Thanks for taking a peek at my card!

Still Seeing Spots

SPOTS, SPOTS, SPOTS.......are you seeing 
them everywhere? 

                                                                                                        
CFC56

The current challenge at CAS-UAL FRIDAYS is SWEET SPOTS.  This is a great challenge!  Although I have plenty of patterned paper with polka dots,I decided to design my own polka dot paper.  I began by using the eraser end of a pencil and stamped a strip of multicolored dots onto my white cardstock and used a Q-tip to add smaller black dots on the colored dots.  I purposefully tried not to center the black dots to make it look more random. I cut a scalloped like edge along the two outer edges of the dots leaving the top edge of the card intact.  I lifted this polka dot strip up and adhered a piece of black cardstock under it.  For the flowers, I created a series of  dots on white cardstock with a black marker.  I cut a flower shape from the black and white polka dotted paper, added a black center and fringed the flower. To make the flower pop, I added a black mat. I finished the card by writing the sentiment with a black marker.

Thanks for visiting my blog!


.

Monday, June 11, 2012

Hello Dotty

CFC56This week CAS-UAL FRIDAYS has a "Sweet Spot" challenge.  I made this simple hello card for the challenge using polka dotted scraps from my stash.  I hand-cut the letters to spell HELLO and matted them on a red cardstock.  I added the strip of light yellow and black polka dot ribbon and the bow.
Thanks for stopping by!

Sunday, June 10, 2012

Weave It! A Card Patterns Sketch 169

This was one of those cards where I started out with something completely different in mind, ran into a block and walked away.  When I came back to it, I totally changed it. The card is based on a sketch at Card Patterns.  On round two, I started with the floral pattern paper and matched the yellow and purple cardstock to it.   I decided to weave the ribbon shaped portion of the card, varying the widths of the purple and yellow cardstock.  This is the first time I used a weaving technique on a card. I enjoyed it and will do it again. Using decorative edged scissors, I hand-cut the flower and added purple chalk around the edges of the yellow petals. The center is Bubble-A-Bilities from Papter Studio and the bow is embroidery thread. Here is the card and sketch:

I hope you enjoyed visiting! 
Thanks so very much for stopping by!

Friday, June 8, 2012

Beaded Dragonfly Card, FMS#38

This dragonfly card was inspired by a challenge at Freshly Made Sketches.  For this card, I created the patterned paper with a black marker and a white gel pen.  For the dragonfly, I used red wire, added beads and designed the wings from vellum that I embossed.  Here'smy card and the sketch from Freshly Made Sketches:


Thanks so much for visiting!

Just a Note: Two Musical Note Cards

Good Morning,
I have two more cards for the challenge at Yes, Virginia.  This challenge has been fun and my silly brain wouldn't rest until I created two more cards. This morning I awoke way too early! I was thinking about the designs for the following  cards.   In the first card I decided to use rainbow colored embroidery thread and hand stitched the staff lines.  The  notes are punched and the bass clef is hand-cut.  Since my musical ability is limited to just listening, I consulted my son (a young musician) for the correct clef  for a cello and used it because the photo that inspired this was centered around cellos. It turns out I should have asked more questions about musical notes.  After I adhered the notes, my son taught me a bit more about them....oops, too late!  I now know that my placement of the double 8th notes isn't exactly correct.  So, I guess you can say I am expressing my artistic interpretation of  "musical notes" on these cards.  The second card is much more simple and the staff lines are created from cardstock.  I used chalk around the edge of the first card and along the horizontal strips on the second card.
Just a Note Embroidered  Staff Lines


Here are the photos from Yes, Virginia that inspired these cards:
Thanks for stopping by!

Thursday, June 7, 2012

Yes, Virginia...I'm Inspired CardsI

Virginia at virginialusblog.blogspot.com shared two wonderful cello photos on her blog and challenged us to use them to create cards.    I created these two cards:
Rainbow Trees card
Rainbow Hearts card

These are the photos that Virginia's daughter took, that inspired the challenge.
Thanks to Virginia for posting a challenge!  Hope you enjoyed your visit to my blog!

Tuesday, June 5, 2012

All Smiles Card

All Smiles
Here is a card I made for the Makeover Monday challenge at Paper Crafter's Library.  Tracy Wegener demonstrated a makeover of a card created by Andrea Walford.  My inspiration came from both cards.

Tracy's Thank You Card
Andrea's Happy Birthday Card
Thank you for stopping by! 

Playing with Tags

These two cards were inspired by Ashley Newell @ A New Design Blog  and Kimber @ Scrapbook & Cards Today. Ashley and Kimber both designed amazing cards with tags.   If you visit Ashley's blog, she has a great tutorial for her card. Here's what I came up with:
Baseball Tag Card

Floral Tag Card
  Thanks for stopping by!  
Hope you enjoyed your visit!

Monday, June 4, 2012

Lost? Sketch it Out June Challenge at Club CK

When I saw the  lovely sketch and a gorgeous layout at The Paper Doll (and also part of the June Sketch it Out Challenge at Creative Challenges), I knew I had to try to use the sketch. I loved how adaptable the sketch was and after playing around a bit, I ended up creating the layout with only two photos. Here's my take:


Pull green tab to view journaling and more photo

I included more photos in a small book that I tucked into a pocket to the left of the two photos.  I also added the journaling on the cover (in a vellum pocket).  I included stitching down the spine of the small book.  As for the embellishments, the butterflies are from actual photos I took during our hike. I just printed them in various sizes.  The flowers are handmade and inspired by the many flowers we saw while hiking. I created the leaf pattern on the cover of the book by inking around a leaf that I cut from cardstock.

    Thanks for stopping by!