Showing posts with label Makeover Monday Challenge. Show all posts

Sunday, October 28, 2012

Merry Christmas

This is my second card for the Makeover Monday Challenge at Paper Crafter's Library.  I really liked Andrea's design. It was so clean, simple and elegant.  Here's her card:

To create my card, I used a Fiskars die. I inked the die with green and red marker then used a piece of water color paper (instead of cardstock) and ran it through the machine. I love how easy this machine is to use and it embosses, cuts and inks in just one pass.  Next I embossed the mat with a stylus and template then added the sheer green ribbon and red brads. I attached the mat to the card base and it was finished.

Supplies:
Cardbase and mat: Daler Rowney Water Colour Paper
Markers: Impress Dual Markers: Emerald, Poppy Red, ZIG Memory System: Pure Green
Die-Cut & Letter Press: Fiskars Fuse Die #091 Merry Christmas
Brads: red (?)
Ribbon: Offray green
Embossing: Fiskars Texture Plate Dots
Adhesive: Scotch Advanced Tape Glider


Tuesday, August 28, 2012

Busy Background

This card began with a very bright and busy background paper from DCWV (The Grade School Collection).  To tone the background paper down, I used Inspired by Nature stamp by Stampin' Up and embossed the text with Ranger Seafoam White embossing powder.  I had seen a similar technique demonstrated byTracy Wegener at Paper Crafter's Library when she created her thank you card.  In the center of my card I created a black circle with a punched border using a Blue Hills Studio Honor punch. I printed the sentiment and embossed it as I did on the background paper.  I also added some small gems around the circle. The card base is blue cardstock. I used the same  blue cardstock to cut two strips that I added to a strip of black cardstock. I adhered it across the center of the card behind the circular embellishment. I think the bright busy background on my card was toned down by using this stamping technique.  It would have been better with a background stamp that has more text, but I don't have that sort of stamp yet.

Wednesday, August 22, 2012

You Did It!


This is the card I created after being inspired by Tracy Wegener at Paper Crafter's Library. This week Tracy did a Makeover of a card she found on Betsy Velman'x blog,  Paper, Scissors and Superheroes. 
Betsy Velman's Card,   Paper, Scissors and Superheroes

Supplies:
White cardbase
Black cardstock
Core'dinations Essential Collection
DCWV Grade School cardstock
ATG ahesive
Elmer's Glue Spots
Button
Ribbon, green and black


Monday, August 6, 2012

Butterfly WIsh

This is my take on the Makeover Monday Challenge at Paper Crafter's Library. Tracy Wegener was inspired by a card created on Julie Ebersole' blog (found here).  Each of these inspirational cards has a window.  Tracy used a butterfly in hers and since I just purchased a butterfly stamp, I felt the urge to try it.  My window is a circle. Sorry, I don't know the source for the paper. It's a piece of scrap that I've been hanging on to.

Tuesday, July 17, 2012

Rows of Flowers

This morning I decided to make this card for the Monday Makeover Challenge at Paper's Crafter's Library and for the the challenge at Yes, Virginia. Tracy Wegener from Paper Crafter's Library created the card below.  It is a gorgeous card with rows of candy fish.  I thought these tiny fish were a delightful way to add dimension to her card.  I looked through my stash to find something to use to add dimension to my card.  After playing with several ideas, I finally settled on a flower.  I used a flower stamp and Tim Holtz's Broken China distress stain to create a series of flowers. I trimmed around each flower then added a black punched circle to the centers. I curled each flower a wee bit to add dimension and adhered them to a light green piece of cardstock. The card looked like it needed something else so I used Tim Holtz peeled pain distress stain to stamp partial flowers around the outer edges of the light green cardstock and then adhered it to black cardstock. This was a technique I had just seen over at Yes, Virginia. Virginia is doing a series on how to stretch your stamps.  In one of her posts she used a partial stamp, rather than the whole image.  That's what I did with the green border and I liked the result.                                                       
              

 Thanks for the inspiration 
Tracy & Virginia!

Tuesday, July 3, 2012

Jingle All the Way...Makeover Monday Challenge


It's time for another Makeover Monday Challenge over at Paper Crafter's Library. Yes, it's only July and I was inspired to make a Christmas card! Truthfully, I make Christmas cards when I feel inspired and Sophia Landry's cards gave me inspiration. I loved the idea of a repeated word, so I began with the word JiNGLE.  I stenciled the letters onto green patterned paper from Little Yellow Bicycle (Christmas Delight), cut them out and adhered them to a second piece of paper from Little Yellow Bicycle. It's hard to tell from the photo, but this paper has a very light green pattern and horizontal red stripes. To soften the edges, I used green chalk around the edges. I matted this paper to a piece of the same green paper that I cut the letters from and adhered both to a scrap piece of red cardstock.To create the jingle bells, I used an EK Success circle punch and punched two red circles.  I use a 1/8" hand punch and punched two circles in the lower part of each red circle.  Then I used scissors to cut the curved opening to resemble a bell.  I sprayed each bell with Tsukineko Sheer Shimmer Spritz (Sparkle).  I attached the gold trim to the back of the red cardstock with a piece of tape and brought it to the front and adhered it with more tape. I adhered these layers to a white card base.  I used dimensional adhesive behind each bell and adhered them over the gold trim. Two gold bows finished the jingle bells. I completed the card by adding the sentiment that I printed on my computer.  Thanks for the inspiration, Sophia!


Thanks for stopping by.


Monday, June 25, 2012

Makeover Monday @ PCL, Gems

Paper Crafter's Library Makeover Monday challenge inspired me to create this card.  Andrea Walford shared her card as well as her inspiration piece from Teri Andreson.  I was inspired by both of the cards. Since I didn't have an abundance of clear gems. I  used several colors.  I liked the way Teri outlined the green leaf with gems, so I outlined the petals of my flower with them.  I also used a variety of patterned papers just as each of these designers did.   
Andrea Walford's card from Paper Crafter's Library


Teri Andreson’s card from A Bit of This, A Bit of That blog


Saturday, June 16, 2012

Embossed Floral Card


Here's my card for the Makeover Monday Challenge at Paper Crafter's Library.I was inspired by Tracy   Wegener's and Andrea Walford's cards. I love the white embossed backgrounds on their cards and how they off-set the ribbons. As you can see, I also changed the orientation on my card (only because my card base was already scored for this type of fold).
Tracy Wegener's Card
Andrea Walford's Card

I appreciate your comments and thank you for stopping by my blog.

Tuesday, June 5, 2012

All Smiles Card

All Smiles
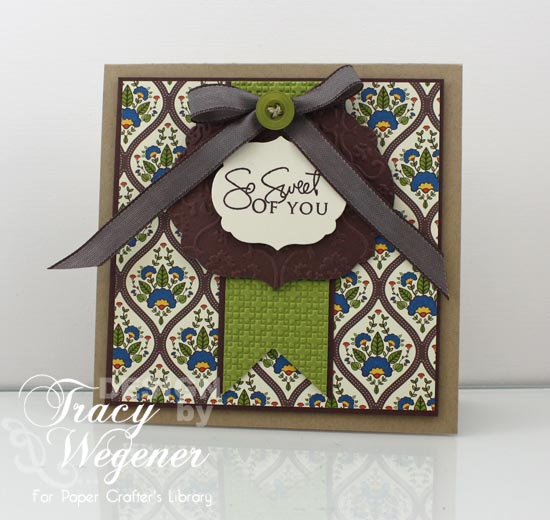
Here is a card I made for the Makeover Monday challenge at Paper Crafter's Library.  Tracy Wegener demonstrated a makeover of a card created by Andrea Walford.  My inspiration came from both cards.

Tracy's Thank You Card
Andrea's Happy Birthday Card
Thank you for stopping by! 

Monday, May 14, 2012

Candy Wrapper Flower

It's Monday, which means that Paper Crafter's Library has another Makeover Challenge.  Today's challenge can be found here: Paper Crafter's Library Project Newsletter Makeover Challenge – Wonderful Friend   When I stopped by the PCL blog today, I was thrilled with all the inspiration I found there and couldn't wait to get started on the makeover challenge.   This card is my take:

The brown petals on the flower are actually made from candy wrappers.  I was twisting one around in my hand yesterday and decided that I ought to keep it because I loved the color and texture of it.  So after watching Tracy @ PCL create her makeover card, I had the perfect use for the candy wrappers.