Sunday, April 14, 2013

DIY Shrink Plastic Snowflakes


I'm very excited about the current challenge at Jingle Belles. It's their THIRD ANNUAL EARTH DAY CELEBRATION and we are encouraged to use a recycled element on our cards.  So I created snowflakes from recycled plastic.   I have been collecting #6 plastic (the kind bakery items are sold in here in the US).  I have a stash of this lovely plastic. Using a heat gun and this plastic gives me an inexpensive version of SHRINK PLASTIC. (Hint: if you don't own a heat gun, you can shrink the plastic on a baking tray in a low temperature oven.)  

I began by running a piece of this # 6 plastic through my die cut machine, using a snowflake die.  My machine doesn't always punch all the way through so I pass it through the machine a few times. Next comes the fun and magical part.  I lay the snowflake on an old cookie sheet, grab my heat gun and a wooden skewer.  I hold the heat gun about 4 four inches away from the plastic snowflake and heat the plastic.  I use the skewer to hold the snowflake so it doesn't blow around the tray and to help shape when necessary. As the plastic is heated it starts to shrink. I love this part. It is just so fascinating to watch!!!  It starts to shrink and almost looks like it will shrivel up and be ruined, but once it shrinks all it can, it starts to unfold itself. Sometimes I use the skewer to encourage the plastic to lay flat or in a certain position but generally if I work slowly and don't rush the process the results are fabulous.  Here are a few photos to help you visualize the process. 
These is the full size snowflake just after it was cut from the #6 plastic with a die machine.
I move the heat gun around making sure all parts of the plastic are heated evenly.
Once it flattens make sure it is cool before touching it! It's very hot and sticky!

This photo shows the snowflake during the final stage. It is starting to flatten out. (Sorry for the blurry photo.)
As my snowflakes started to cool, I loosened them from the tray with the wooden skewer....(DON'T be tempted to touch it....it is VERY HOT).  Next I adhered my snowflakes to a green embossed panel using a glue gun. I wrapped the bottom of the green mat with three strands of silver thread and added a handwritten sentiment. I attached this to a white panel with lightly green inked outer edges. I adhered this to the cardbase and also inked around the edges of the cardbase.


Supplies:
Cardbase: Paper Studios, Cardstock: Recollections, Die Cut/Machine: Fiskar's Fuse, Embossing Folder: Darice Swirls, # 6 Recycled Plastic, Silver thread,Ink: Memento Bamboo Leaves, White gel pen: Sakura, Adhesive: AdTech Glue Gun/Sticks, Scotch ATG, Wooden skewer, Baking sheet, Heat gun

Thanks for visiting!


Thursday, April 11, 2013

Painted Dish Soap Dispenser /Sponge Background

Make My Monday's challenge this week is to create your own background. I love this kind of challenge.  To create my background, I grabbed three different shades of blue acrylic paint, a dish soap dispenser/ sponge and some cardstock. This particular sponge surface has a mesh covering, which I thought would create an interesting texture. Using one shade of blue at a time, I spread the paint directly from the tube right onto the sponge surface then pressed it randomly onto the white cardstock. I repeated this with each shade of blue. I set it aside to dry and cut banners from white cardstock. I also cut a dark blue strip and edged it with a border punch. After the paint had dried on the newly created background cardstock, I cut a panel to fit the front of a cardbase and added the blue strip. It looked a bit flat, so I ran it through a paper crimper before adhering it to the cardbase. Next, I used the excess background cardstock to punch flowers. I also punched flowers from white cardstock and layered them together adhering a blue center on each set of flowers. Using the dark blue carstock, I punched leaves and adhered them to the flowers. With a marker, I added faux stitch lines around two of the banners. On the center banner I inked the edges, than layered the banners and flowers onto the background.
A close up of the mesh covering the sponge.

This was a great challenge and I loved that I was able to put my tubes of acrylic paint to good use.
This is the dish soap/sponge dispenser I used.


Supplies:
Cardbase: Paper Studios, Cardstock: Recollections (white), Dish soap/sponge dispenser, Bazzill (blue), Punches: Stampin' UP, McGill, EK Success,Crimper: Marvy Uchida, Acrylic Paint, Master's Touch, Ink: Studio G, Marker: Zig, Adhesive: Scotch Quick Dry, Scotch ATG,

Tuesday, April 9, 2013

Travel

I created this card for two challenges. First there is the LIME & BLACK color challenge at  Less is More. Secondly, I decided to use TRAVEL elements, which is the cue card challenge at CASology.

I began by punching the truck, sailboat and car from lime green cardstock. Next I used a circle to punch around each of the travel images. I layered these circles on tags and adhered the three tags to a hexagon embossed background.


Supplies:
Cardbase: Paper Studios, Cardstock: DCWV, Recollections, Embossing Folder: Stampin' Up/Sizzix, Punches: Truck & Car: EK Success, Boat ?, Tag Punch: Stampin' Up, Adhesive: Scotch Quick Dry, Scotch ATG

A Forgotten Thank you


IMG_9515_edited-1This is one of those post that I started and then saved so I could run off and do something else. I forgot to come back to it in time to post it for the challenge at MUSE .

I was influenced by many elements in Laurie's card:  the textures, the shapes and the colors. My favorite element on the card is the text patterned paper and makes a fun background.


Supplies:
Cardbase: Paper Studios, Patterned paper: DCWV, Circle Punch: Martha Stewart, Leaf Punch: McGill, Die Cut: Fiskar's Fuse, Brads, Twine: The Twinery, Adhesive: Scrapbook Adhesives 3D Foam Squares, Scotch ATG


Flower Patch

I was cleaning off my work table in my studio and discovered a pile of flowers that I had punched. So I used them to create this patch of flowers. It looks a lot like a quilt and since I am currently sewing a quilt, that must be what influenced this creation.

Supplies:
Cardbase: Paper Studios, Cardstock: Recollections, Bazzill, Patterned Paper MME?, Punches: circle? no brand name on it, Flower punch: Stampin' Up, Adhesive: Scotch Quick Dry, Scotch ATG


Chevrons & Flowers

You might just say I'm going a little crazy with chevrons and flowers. I've created several cards wtih this theme. Thanks to some recent challenges out there, I have rediscovered a pair of decorative scissors that I used here to create the chevrons. For this card I simple cut three chevrons and punched a bunch of flowers from cardstock. I added punched centers and added a bit of detail to each flower with a white colored pencil. To highlight the chevrons a bit more, I used a needle and pierced the cardstock along each chevron.

If you go to CAS-ual Fridays or the new Fusion Card Challenge, you'll find that both blogs are using the chevron and flowers as challenges.  For the Fusion challenge there are several options.
We can use the sketch provided by Jackie, or Lesley's inspirational photo to create a card.  The last option is to "Fuse" them and use a bit of each, which is what I did for this card.


 Supplies: Cardbase: Paper Studios, Cardstock: Bazzil (green) and red, yellow, cream and blue scraps, Needle,Crayol White Colored Pencil, Stampin' Up Flower punch,Circle punch? no name on it,  Adhesive: Scotch Quick Dry

Monday, April 8, 2013

Snowman with Nontraditional Holiday Colors

The April sketch is ready to inspire us over at 52 (Christmas) Card Throwdown. There's several layers on this super fun sketch. I decided to rotate the sketch so I could create this snowman card. I also decided to break with tradition and use colors that are not typically holiday colors.  I began by cutting the handmade snowman from white cardstock, adding highlights with blue ink and then dressing him in a hand cut vest from that gorgeous gray patterned paper. I cut a hat from black cardstock and used a strip of the gray patterned paper as the hat band. Using the reverse side of the gray patterned paper, I created the yellow scarf and the buttons. I cut the arms from a scrap piece of brown cardstock then adhered the snowman to the patterned background using dimensional adhesive. I matted this on black cardstock and then matted this to a yellow strip that I trimmed with a black scallop edge. To give the yellow strip a bit more interest, I added punched snowflakes with gem centers.  I printed the sentiment with my computer and added three black pearls to the bottom right hand corner. I mounted everything on a gray cardbase. Inside I added a  writing space. I used a white piece of cardstock, with rounded corners and punched three snowflakes in the bottom right hand corner.

Supplies:
Cardbase: ? no name on it, Patterned papers: Carolina Breeze by Teresa Collins, Stampin' Up (vest/scarf), Cardstock: DCWV, pieces from my scrap stash,  Snowflake Punch: EK Success,Ink: Studio G, Pearls/ Gems: Studio G, Adhesives: Scotch ATG, Scrapbook Adhesive 3D Foam Squares.

Sunday, April 7, 2013

Chevrons & Flowers


Since I was playing around with chevrons and flowers this weekend, I decided to create a few more cards. I used the same chevron patterned paper on both cards. On the first card, I punched three flowers from black cardstock and added layered circles for the centers. For the second card, I used a leaf punch and the chevron paper to create the flower petals and matted them with black cardstock.

Supplies:
Cardbase: DCWV, Patterned Cardstock: MME On the Sunny Side, Black cardstock: Recollections, Punches: Black flowers: Stampin' Up, Leaf punch: McGill, Circle: EK Success, Stamp: Stampin' Up, Stems: Handcut, Embroidery Thread: DMC, Adhesive: Scotch ATG, Scotch Quick Dry, Elmer's Glue Spots, Colored pencil: Crayola, Ink: Memento

Fusion!

Have you heard about FUSION? It's a new card challenge blog!  Here's how it works: Jackie provides an inspirational sketch and Lesley provides an inspirational photo. Our challenge is to use Jackie's sketch or Lesley's photo to create a card...OR we can create "Fusion" by combing BOTH. Clever, right? Well, I had fun experimenting with these options and I came up with this card that combines both the inspirational photo and the sketch.  I began by cutting chevrons from white cardstock with a pair of decorative scissors. Then I inked the edges of the two chevrons with blue ink. Next I punched out six flowers and six centers and inked the flowers based on the colors in the inspirational photo. For the cardbase, I selected a blue cardstock and then used an embossing pen marker to "write" random words and then I embossed them with a clear iridescent embossing powder.  In person, you can tell that there are words, but it's a challenge to see that in this photo.  Next, I layered the chevrons and flowers on the card base using the sketch for placement. I wrote "Happy Birthday" with a marker and a strip of white cardstock, cut the ends to create a banner and inked around the edges with blue ink.  This was a super fun challenge.


Supplies:
Cardstock: Recollections, (white), ? (blue), Bazzill (green),  Darcie's Country Folk Clear Iridescent Embossing Powder, Heat Gun, Zig Emboss Markers, Flower Punch: EK Success, Inks: Studio G, Adhesive: Scotch ATG

Snowflakes Piling Up

Snowflakes are piling up on this card. In fact they are stacked and layered. I adhered them to a piece of red paper that I punched with a notebook edge and matted the red onto white. This is a pretty simple card. I'm submitting it for the Christmas in April challenge over at 365 Cards.

Supplies:
Cardbase: Paper Studios, Cardstock: Recollections: Punches: EK Success, Stampin' Up, Adhesives: Scotch ATG, Scrapbook Adhesives 3D Foam Squares

Saturday, April 6, 2013

Potted Christmas Plant

This is my Christmas card for the "Christmas in April" challenge over at 365 Cards. I had fun with this one. I decided to do a potted plant in hopes that it will inspire spring weather to come and STAY here.  I created the flowers with pieces of red scrap paper and a heart punch. I added a green circle for the center of each. Next I added a stem and wrapped the stem with holly leaves that I attached to artistic wire. I created a hand made flower pot, shaded it with colored pencils and tied a piece of green embroidery thread around it. I layered the flowers and the flower pot on a piece of crimped white cardstock and added three strands of embroidery thread to the base. I hand cut the letters for the word JOY and used a punch to punch out the center of the letter O. I matted the white cardstock onto a piece of green cardstock and then the cardbase.

Supplies:
Cardbase: Recollections, Cardstock: Recollections: white, green ?, Red, scrap pieces, Crimper: Marvy Uchida, Wire: Artistic Wire, Punches: EK Success, Embroidery thread: DMC, Colored pencils: Crayola, Adhesive. Elmer's Glue Dots, Scotch ATG

Earthy Toned Chevrons & Flowers

SK174 US205
When I saw the sketch at Unscripted Sketches I knew it was time to use the chevron patterned paper from Fancy Pants Designs. I love the soft, earthy tones in the chevrons. I began by trimming the top and bottom edges on a strip of chevrons so that the edges would be pointed and the pattern would be more prominent. Then I paired the strip with flowers that are shades of brown. I punched two of each flower, layered them together and added a gray center. Next, I hand-cut stems and leaves and adhered them in a clump to resemble a bouquet and finished with a bow. I used dimensional adhesive behind three of the flowers.

Supplies:
Cardbase: Kraft ?, Patterned Paper: Fancy Pants Designs: Chevron, Other: ? from my stash of scrap pieces, Punches: McGill, Adhesive: Scrapbook Adhesives 3D Foam Squares, Scotch ATG

Friday, April 5, 2013

A "Blingy" Wreath

It's a BLING thing over at Jingle Belles! We're challenged to create a card which incorporates bling, glitter, glitz, gems, shimmer, or anything sparkly. I decided to "bling-up" a wreath. First I cut a ring from cardstock and then I wrapped it in green ribbon. Next, I added berry red colored pearls and wrapped the wreath again with a metallic ribbon.  Using a Kraft cardbase, colored pencils and ink, I created a faux wood texture for the background. I rounded the corners of the cardbase and adhered it to a larger piece of green cardstock. To add a bit of texture, I poked holes around the green cardstock with a needle.  I attached a red bow to the wreath and wrote the sentiment with a marker on a scrap piece of Kraft cardstock. I inked around the edges of this before adhering it to the card. Because it's hard to write on Kraft cardstock, I adhered a white panel inside as a writing space. 

Supplies: Cardbase: Paper Studios?, Ink:Fiber Scraps: E-Z Walnut, Colored pencils: Crayola,Corner rounder: Creative Memories,  Ribbon: Offray, Marker: Bic Mark It, Green Cardstock: DCWV, Needle, Pearls: Queen & Co.

Thanks for stopping in for a visit!


Thursday, April 4, 2013

Warm Wishes & Hot Chocolate for Two

ANYTHING but a CARD, ATG, TAG GOES...now that's a fun challenge! It's the current challenge over at 52 (Christmas) Card Throwdown. So...my project is a Hot Chocolate for Two pocket folder. To create it, I used a pattern created by Andrea Walford, from the Paper Crafter's Library. (I am not providing the link because you have to be a member of the Paper Crafter's Library to access it.) After I had made the folder with two pockets, I was ready to start embellishing. Selecting the patterned cardstock was the challenging part for me. I finally broke down and used some of my favorite cardstock. It's a gorgeous, glittered Christmas collection from MME, called I Believe. I've had it in my paper stash for awhile and I finally convinced myself that it was time to start using it. So, I began by cutting (gasp!) a handmade mug shape from it.  I added a bit of brown cardstock to represent the cocoa and added highlights with a white colored pencil. Next came the handmade candy cane. I cut the shape from white cardstock and added the red stripes with a marker and highlights with a gel pen. I made a slit in the cocoa and slid the candy cane in and adhered it. To make the steam, I used artistic wire and shaped it, then poked it into the cocoa and adhered it.  I mounted the cup with dimensional adhesive onto an oval that I cut from white cardstock. I inked the edges of the oval and wrote Warm Wishes with a marker.  I adhered this to the front of the pouch. In Andrea's version, she used a tube filled with marshmallows. Since I didn't have a tube, I inserted two candy canes. They can be used as stirring sticks and add the delicious taste of peppermint to the cocoa. (AND yes, I know it's April and candy canes are hard to find in the stores, but I have several dozen still hanging around from the post Christmas sales.)  Inside I placed a package of hot chocolate mix in each pocket then tied it closed with the ribbon.  Here's what the inside looks like:

MY INSPIRATION: Andrea Walford's Warm Wishes Hot Chocolate for Two

Turns out....I forgot didn't get this posted in time to make the challenge.  But...I'm so glad I actually put one of these together. 
Supplies: Cardstock: MME "I Believe" Glitter Cardstock, red/white: Recollections, Wire: Artistic Wire, Markers: Bic Mark It, Ribbon: Oriental Trading, Candy Canes, Adhesive: Scotch ATG,  Red-line tape, Scrapbook Adhesives Foam Squares, Ink: Studio G, Colored Pencils: Crayola, Gel Pen: Sakura, Hot Chocolate: Swiss Miss, Pocket Folder Tutorial: Andrea Walford Paper Crafter's Library

April Sketch


The new April Sketch is up at The Sketch File. I hope you'll stop by take a peek at what the other DT members have created. We'd love to have you play along with us.

My card followed the sketch pretty closely and I stuck to shades of brown. If you follow my blog, you know that I use this cattail stamp frequently.  (It reminds me of my childhood home, where cattails grew in abundance.)

Supplies: Cardbase: Paper Recollections, Cardstock: Core'dinations,chocolate, Patterned Paper:  ColorBok                Stamps: Market Street Stamps, growth, Stampin' Up, Ink: Memento, Circle Punch: EK Success, Adhesive: Scotch ATG, Embroidery Thread: DMC

Tuesday, April 2, 2013

Mother's Day

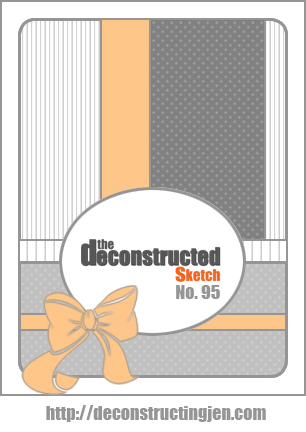
Deconstructed Sketch 95I used the current sketch at Deconstructing Jen as the basis for this mother's day card. I ended up using all bits and pieces of scrap paper (mostly MME) and cut and layered the pieces onto a cardbase based on the sketch. For the center oval, it was looking a little "flat" so I dry embossed it, layered it over a strip of red cardstock that I crimped and added the leaves around the oval. I printed Happy Mother's Day on a separate piece of cream cardstock, trimmed around it and adhered it to the center of the oval.
Supplies: Cardbase: Paper Studios, Patterned Paper: My Mine's Eye: Antique Dots, Paper Crimper: Marvy Uchida, Leaf Punch (yellow...no brand name on it), Adhesive: Scotch Quick Dry, Scotch ATG, Corner Round: Creative Memories
  

Monday, April 1, 2013

Layered Embossed Circles

The current sketch at Cardabilities has inspired this card with layered, embossed circles. I started by digging through my stash of blue scrap pieces of cardstock. I selected several shades of blue and then dry embossed them. Next I punched circles of different sizes from the blue cardstocks and layered them on a hand cut cream colored banner that I crimped. On the top edge of the banner, I used a notebook fringe punch. I layered the cream banner on a piece of blue cardstock and then used a small strip of blue to punch with a circle border punch. I layered this strip of circles and the banner onto a piece of cream cardstock that was slightly smaller than the cardbase. This was a super fun sketch!

Supplies: Cardbase:Paper Studios, Cardstock: Bazzill and various scrap pieces of blue, Punches: circle border punch: Martha Stewart, Other circles: EK Success, Notebook edge: Stampin' Up, Crimper: Marvy Uchida, Fiskars Texture Plates,


Dragonfly Collection

US_sketch204Unscripted Sketches has a fabulous sketch this week. My take on the sketch is this dragonfly card. I punched a series of dragonflies in cream cardstock. Then I trimmed the cardstock to match the sizes of the images in the sketch and inked around the edges. Next, I poked holes around the border of each strip with a needle and adhered  the images to the cardbase with dimensional adhesive.  I stamped happy birthday onto cream cardstock, inked the edges and adhered it to the cardbase. Then I tied a length of embroidery thread around the left edge and tied a bow.  Lastly, I adhered a cream colored piece of cardstock inside to use as a writing surface.


Supplies:
Cardstock: Bazzill, Punch: McGill, Needle, Ink: Studio G, Embroidery Thread: DMC, Adhesives: Scrapbook Adhesives 3d Foam Squares, Scotch ATG

Friday, March 29, 2013

Graphic 45 Birds


This is one of those cards that came together quickly. When I saw the current sketch at Freshly Made Sketches,  I knew that it was time to reach for my Graphic 45. You might say I've been a little hesitant to use it. It's one of those paper collections that I love, but resist using because I want the perfect project for it. The Graphic 45 Tropical Travelogue cardstock has a whole sheet of wonderful images. That's were I got the birds. I started by cutting the image of the birds from the patterned paper and then matted it at an angle to a piece of black cardstock. Then I tore a tree branch from brown cardstock, inked it and layered it over a piece of green cardstock that I had put through the paper crimper. I added punched leaves and layered all the pieces on the patterned mat. I inked around the edges of the patterned paper, then layered this on a black mat. I also inked around the edges of the card base.

Supplies: Cardbase: Paper Studios, Ink: Fiber Scraps: e-z Walnut Ink,Memento, Punch: no name on it, Tree branch: handmade, Cardstock: Cordinations (chocolate), Bazzill (green), Patterned Paper: Graphic 45 Tropical Travelogue, Adhesive: Scotch ATG, Scotch Quick Dry.

From Trash to Treasure

The other day, I did a bit of dumpster diving...well, not really a dumpster, it was a small trash can. My husband had finished working on a project and as I walked past the trash can, I noticed that he'd thrown away a circular sanding disc that he had used on his electric sander. I grabbed it and of course he noticed. "What are you going to do with that?"was his immediate response. He really didn't need to ask. He knew I had a craft in mind. So, I turned the discarded sanding disc into a flower by cutting around the edges with a pair of scissors. Fortunately, those lovely holes were already in the disc. I think that's one of the things that made me rescue it from the trash bin.  After shaping the edge of the disc, I added some cream colored embroidery thread, hoping to give each petal more definition. Then I punched several circles, fringed them and layered them in the center. I punched a small circle from the sand paper excess to go in the center of the flower. I used a scoring board to add embossed lines to the card base, and rounded the corners with a corner punch. Next, I used a border die and cream cardstock to create the two strips that are to the left of the flower. I also punched a series of leaves/stems, added detail with a colored pencil and adhered everything to the card base. The moral of this long tale:  I need to peek into my husband's workshop trash bin more often, just to see what other treasures I can find!

Supplies: Discarded sanding disc, cardbase: Recollections, Cardstock: Bazzill (cream), Fox River Paper Co (green), Colored Pencil: crayola, Leaf Punch???no name on it, Circle Punches: EK Success, Adhesive: Scotch ATG, Scotch Quick Dry, Scoring Board: Martha Stewart, Embroidery Thread: DMC, Border Die: Life Style

Merry & Bright with Bling

This tree says it all...BLING!. I'm blinging with Jingle Belles today. The challenge is to "create a holiday card which incorporates bling, glitter, glitz, gems, shimmer, or anything sparkly!" Don't you just love that! The first thing I thought of was my growing collection of gems. I started by adhering blue and white gems to a green tag in the shape of a tree. Then I topped the tree with star shaped gem. Next I mounted the green tag on a piece of crimped chiffon/cream cardstock (yeah, I know it looks whitish, but trust me it's definitely Chiffon). I then used embroidery thread to stitch around the outer edges of the tag with a blanket stitch. The background paper was easy to create. I used my computer and MS Word. I simply repeated the phrase  "May Your Days Be Merry & Bright" across the page using WordArt and a green font. Before adhering the tag and background panel to a green cardbase, I wrapped the background panel with green embroidery thread. I used the same green embroidery thread to create a bow and added it to the top of the tag. Inside the card, I included a piece of Chiffon cardstock to use as a writing space.

Supplies: Cardbase/cardstock: Bazzill, Embroidery Thread: DMC ,Gems: Studio G, Needle, Adhesive: Scotch ATG, Crimper: Marvy Ucida

Text Background

I really enjoy using text as a background on my cards. For this card, I explored the internet and retrieved quotes about happiness. I copied them into a word document, changed the fonts and printed them on chiffon cardstock. Next I used a handmade leaf stamp and randomly stamped the leaves onto the text panel. I added stems with a colored pencil and punched a flower from pink cardstock, then added highlights with colored pencils and cut a center from the text cardstock. To finish the card, I inked around the edges of the text panel with pink ink.

Supplies: Cardstock: Bazzill, Chiffon, Leaf Stamp: Handmade, Ink: Memento Bamboo leaves, Studio G, Colored Pencils: Crayola, Punch: Paper Shapers, Adhesive: Scotch ATG, Text: Happiness Quotes from http://www.quotegarden.com/happiness.html

Thursday, March 28, 2013

Blue Beauties

This CAS card has two blue flowers as a focal point. I stamped each flower, drew some stems and leaves and fussy cut around them and layered them in the center of the cardbase. Then I used a border stamp and the same colored ink to create the vertical strip of stamped flowers. It's a pretty simple all occasion card.

Supplies:  Cardstock: Bazzill, Chiffon, Stamp: no name on fhe large floral stamp, Border stamp: Hero Arts, Ink: Studio G, Adhesives: Scotch ATG, Scotch Quick Dry

Staying in Neutral

Last week there was a challenge on the Jingle Belles blog to use only neutrals. I found this to be a real challenge but ended up making two Christmas cards for that challenge. I thought I would challenge myself again with the same theme, but this time, I created a birthday card.  I began by selecting papers and cardstocks that were brown or tan.  I even threw in some wall paper that I pulled from a sample book that was given to me.  I used brown ink to stamp the outline of leaves and colored the leaves with markers and colored pencils. I layered these leaves on a textured piece of wall paper. It has these lovely horizontal stripes. I adhered the wall paper and leaves to a tan piece of cardstock and stamped happy birthday with brown ink. I layered the remaining pieces of wall paper (banner) and the patterned papers based on this week's sketch at CAS(E) this Sketch. It's a  fun sketch and I am pleased that I was able to keep the card CAS even with all the layers.

Supplies:  Stamps: Market Street Stamps, Growth, Stampin' Up, Birthday Whimsy,Colored Pencils: Crayola, Makers: Bic Mark It, Patterned Paper: Echo Park, This & That, Wallpaper: Wilton, Cardstock?, Adhesives: Scotch ATG


Tuesday, March 26, 2013

Rainbow: Just a Note

I made this card just for the fun of it. I was organizing my ink pads and I came across a rainbow colored ink pad that I forgotten that I owned. I put it use on this card. I simply dragged it across a piece of white cardstock and repeated this until I had covered the cardstock. Next I trimmed it so it would fit on the black cardbase. I wrapped a heavy black thread around the rainbow cardstock to create the musical scale and added handmade musical notes and a handmade G clef. I attached the notes with dimensional adhesive and then adhered the rainbow panel to the cardbase. I made a sentiment tag with a leftover piece of the rainbow cardstock. I wrote the sentiment with a marker before matting it with black cardstock. Inside I added a writing surface which is a piece of white cardstock with rainbow inked edges.

Supplies:
Cardstock: Recollections, Thread (no name on it), Ink pad:  VersaColor, Adhesive: Dodz, Scotch ATG, Marker: EK Success


Saturday, March 23, 2013

Tree Tag

I couldn't resist creating yet another tree with the new pine tree punch that I recently purchased. This time I mounted the tree on a tag and inked around the outer edges of the tag. I added embroidery thread around the base of the tag and attached a bow as well. I mounted it on patterned paper and used a green card base. To add detail to the tree, I added pearls and a tree trunk.

Supplies:
Cardbase: Fox River Co., Patterned Paper: Fancy Paints/St. Nick, Tag: piece of scrap cardstock, Punch: Martha Stewart, Pearls: E-Line, Embroidery Thread: DMC, Ink: Fiber Scraps E-z walnut ink , Adhesive: Scotch ATG

Friday, March 22, 2013

Imagine That!

Sometimes I wake up in the middle of the night with an idea for a card swimming around in my brain. This card is based on the image I woke up with this morning.  Although I imagined it with two shades of green, I decided to give blues a try. It's one of those quick cards that came together in about 5 minutes. It also came together much like I had imagined...Imagine That!

Supplies: Cardbase: Paper Studios, Stamp???no name on it, Twine: The Twinery, Pearls: E-line, Cardstock: Recollections, Ink: Studio G. Adhesive: Scotch ATG

Tuesday, March 19, 2013

Peace on Earth

Christmas Animals is the current challenge at 52 (Christmas) Card Throwdown.  This time I created handmade sheep. I cut them from white cardstock and added detail with colored pencils and a marker. Then I stamped the fence image. It wasn't wide enough so I drew a few more posts and finished all of the fence with colored pencil and ink.  I punched pine branches and adhered them in a ring to create a wreath and added the pearls and bow. To create the snow on the ground I tore white cardstock and used a gel pen to create the flakes in the sky. I also sprayed the card with shimmer mist.

Supplies:Cardbase: Fox River Co, Cardstock: Recollections, Stamps: Stampin' Up, Punch: Martha Stewart, Ribbon: Offray, Gel Pen: Sakura, Marker: Ek Success, Colored Pencils: Crayola, Shimmer Spritz:  Tsukineko Ink:Fiber Scraps,   Pearls: E-line, Adhesive: Scotch ATG, Scotch Quick Dry

Monday, March 18, 2013

Framed Tree

Using a newly purchased pine tree branch punch, I punched a series of branches and adhered them together to create a tree. I added a trunk, framed it with a white die cut frame that I mounted with dimensional adhesives and finished the tree by adding pearls.  The inside sentiment reads: "Have a Tree-mendous Holiday" I was inspired to make this card for the "Frame It" challenge over at Less is More.

Supplies:
Cardstock: Recollections, Frame: Fiskars Die, Punch: Martha Stewart, Pearls: E-line, Adhesive: Scotch Quick Dry, Scrapbook Adhesives Foam Squares

Christmas Penguin....Warm Winter Wishes

Christmas Animals is the current challenge at 52 (Christmas) Card Throwdown. So here's this little penguin all wrapped up in his scarf and ready for Christmas. I used a die cut to create him and then used acrylic paints to add detail.  I also used a die to create the large snowflake and used a punch to create the smaller snowflakes. I centered the large snowflake on a piece of black cardstock, matted this onto a piece of patterned paper and attached it to the cardbase. Next I adhered the penguin and scattered the smaller snowflakes around it. The sentiment (inside) reads: Warm Winter Wishes.

Now that it is finished, I realize that it's a NO-Bird challenge....ooops!

Supplies:
Cardbase: Recollections
Cardstock: Recollections
Patterned Paper:Teresa Collins: Carolina Breeze
Large Snowflake and Penguin Dies: Fiskars
Snowflake Punch: Emagination
Acrylic Paint:Master's Touch
Adhesive: Scotch ATG, Scotch Quick Dry