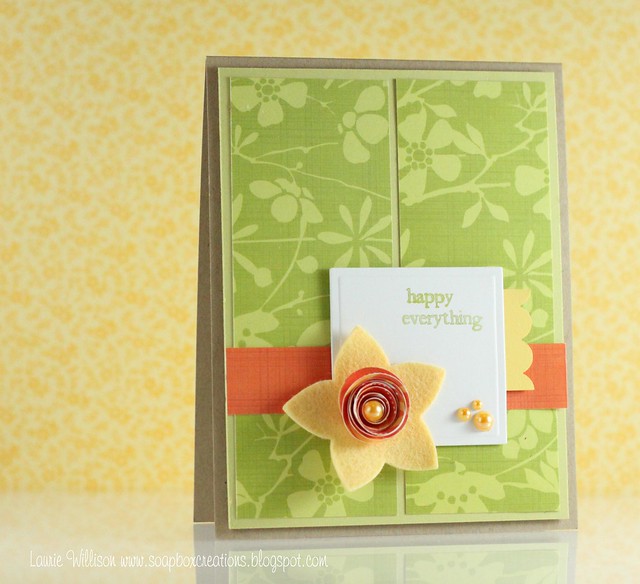
We had a birthday here this weekend. My husband received these two handmade cards. The first one was created by my teenage son. He and I created our cards simultaneously, can you tell? We actually shared similar elements: circles, strips. It's funny that we both ended up with the strips running down the right hand side because we really didn't discuss our plans,we just started creating, reaching for punches and pieces of paper.
Supplies card #1: Cardbase: Fox River Paper Co., Cardstock: Recollections, Punch: EK Success, Stamp: Stampin' Up, Ink: Memento. Adhesive: Scotch ATG
Supplies card #2: Cardbase/cardstock: Kraft, Recollections, Circle Punches: EK Success, Wire: Artistic Wire, Adhesive: Scotch ATG, Ink: Memento
Monday, March 18, 2013
Spring Flowers
Spring must be around the corner. I'm making more and more cards with flowers these days. This one is based on a color challenge at Just Us Girls. The colors for this challenge are white, green and orange. I used a few punched flowers, some hand cut stems and leaves, a colored pencil, ribbon and a die to pull this card together. It's a very simple card, but very "springy".
Supplies:
Cardstock: Recollections (white), DCWV (green)
Punch: Stampin' Up, an un-named 1/4" circle punch
Colored Pencil: Crayola
Ribbon: Offray
Adhesive: Scotch Quick Dry, Scrapbook Adhesives 3D Foam Squares
Sunday, March 17, 2013
Happy Birthday for Two Challenges
Supplies:
Cardbase: Paper Studio
Patterned Papers: ??? scraps from my stash
Stamp: Market Street (cattails), Stampin' Up (sentiment)
Ink: Memento
Markers: Bic Mark It
Colored Pencil: Crayola
Buttons (bought them at a garage sale)
Embroidery Thread: DMC
Adhesive: Scotch ATG, Elmers Glue Spots
Framed Flowers
Supplies:
Cardbase: Paper Studios
Cardstock: Bazzill
Buttons
Punches: McGill, Stampin' UP (Paper Shapers)
Adhesive: Scrapbook Adhesives 3D Foam Squares, Scotch ATG, Glue Dots
Saturday, March 16, 2013
Neutral Noel Card 2
This is my second post today as well as my second card for the Neutral Noel challenge at Jingle Belles. The challenge was to use only neutral colors to create a holiday card. I used black, gold, cream, and tan. This card held a real challenge for me because I normally do not do "collage" type cards. I usually end up with something I am not happy with, but this time I liked the result. I think it's because the colors are neutral. I began by using scrap pieces of patterned paper that had tan images or text. I randomly adhered them to a cream colored tag along with some black netting from a vegetable bag. I punched a hole in the top center of the tag and added black and gold threads. I added a smaller metal tree brad and a gold and black star. I created a small envelope that I also layered with patterned papers in a collage fashion. Around the center of the envelope, I added a metal tree brad and slipped a piece of black cardstock through the center of it. For the mat, I stamped Jingle all the Way with a Versamark and added a gold embossing powder. I adhered the tag/envelope to the mat and adhered this to a cream colored cardbase that I trimmed with decorative scissors. The funny thing is, when I saw the description for the "neutral only" challenge at Jingle Belles, I wasn't so sure I could make a holiday card with neutral colors. I surprised myself my creating two cards with these colors!
Supplies: Cardbase: Bazzill, Cardstock: Recollections, Bazzill, Echo Park, Patterned Paper: Paper Wishes, Stamp: Stampin' Up, Versamark: Tsukineko, Embossing Powder: Shimmerz Enamelz: Gold Digger, Brads: Oriental Trading, Decorative scissors, Netting: Veggie Bag, Black String, Gold Trim, Adhesive: Scotch ATG, Scotch Quick Dry.
Lace Angel
This card is for yet another challenge at Jingle Belles. They have the best challenges! This time the challenge is to create a holiday card using NEUTRAL Colors. Here's a direct quote to help clarify: "...create holiday cards which embrace ONLY the neutral colors: white, cream, ivory, ecru, black, grey, charcoal, obsidian, brown, tan, kraft, camel, oatmeal, sienna; use them all together, or choose one and rock the monochrome, whatever you desire; if it's NEUTRAL, it's *IN*!!! And yes, for the record, we consider gold, copper and silver to be the "bling" equivalent of neutrals, so you may use them as much (or as little) as you'd like!"
So, as you can see I have used black, Kraft, cream, and gold. I began by dry embossing a piece of black cardstock using a Fiskar's Texture Template. Next I punched a circle in the black cardstock as well as a piece of cream cardstock that was slightly bigger than the black cardstock. I layered them together leaving a cream border around the black cardstock. Then I used embroidery thread and a needle to stitch around the outside of the circle. To create the angel, I used a punch to create "lace" and then folded and rolled the lace to create the angel's dress and sleeves. I cut out a head, added eyes and a mouth and shaded the cheeks with a tan colored pencil. Her hair is made from moss colored straw. I used a piece of gold wire to create a halo and added a gold colored trumpet. I added more "paper lace" to the black embossed cardstock and included a strip of black decorative tape in the center of the bottom piece of lace and finished by adding a cream bow. I adhered the mat to the cardbase with dimensional adhesive.
Although it is hard to tell from the photo, the angel's dress and the lace are really created from the same cream colored cardstock. I must admit that the photo of this card isn't the best. I couldn't seem to capture a photo that showed the real cream color and the deep black embossed background. This is as close as I could get after way too many attempts....so, I apologize for the "fair" photo.
Supplies: Cardstock: Bazzill cream, Recollections black & Kraft, Punch: Martha Stewart (lace), Stampin' Up circle, Decorative Tape: Darice, Moss Straw? garage sale item, Ribbon Offray, Embossing: Fiskar's Texture Plate, Adhesive: Scotch ATG, Scrapbook Adhesive 3D Foam Tape, Glue Spots
Friday, March 15, 2013
Framed Merry Wishes
52 Christmas Card Throwdown's March sketch challenge was a lot of fun. I chose two different blue patterned papers to create my "frame" and after attaching them, I decided to stamp a snowflake print on them. In the center I used white cardstock, that I also stamped with the same snowflake stamp before I mounted it on black cardstock. In four of the corners of the frame I added 3 punched snowflakes with a gem in the center of each. I also added some gems to the sentiment tag that I stamped and matted with black cardstock.In the end, I wasn't really happy with this card so I didn't submit it for the challenge. I think it looks too flat and I should have included the diagonal space (black in sketch) so that it would give more dimension to the card.
Supplies:
Cardstock: Recollections
Patterned Paper: Oriental Trading
Stamps: Stampin' Up
Ink: Studio G
Adhesive: Scotch ATG
Punch: Tonic Studios
Gems: Studio G
Tuesday, March 12, 2013
Textured Background
I created this card with texture in mind. The challenge over at 365 Cards is to create a textured cardbase. To create my card I cut a piece of black cardstock, folded it in half and then crimped the front only. I love the texture that the crimping creates. I used my Fiskar's Fuse die cut and letterpress to cut the tags. The beauty of this machine is that it cuts and letterpresses at the same time. So, before running the die through the machine, I inked the butterflies with different colored inks before running it through the machine. Once the ink was dry, I ran both tags through the crimper and added some black ink to the edges to give them a bit of definition. Next I wrapped some metallic string around the top of each tag and tied a bow with the same string. This was the most challenging part of the card. That metallic string just wouldn't cooperate! It was difficult to see and was so very slippery! I ended up wrapping it around a bottle, sliding it off and then tying it in the center. I adhered this bow to the top of the layered tags and then hand-cut a butterfly and adhered it to the center of the bow. Using a gel pen, I wrote the sentiment on a piece of black cardstock and matted the black on white cardstock. I also inked around the edges of the white cardstock. I added the pearls and finished by adhering white cardstock inside the card.
Supplies: Cardstock: Recollections, Crimper: Mary Uchida, Die cut & Letterpress: Fiskar's Fuse, Ink: Studio G, Pearls: Prima Marketing E-Line, Metallic string: ??bought it at a garage sale, Butterfly: Hand-cut, Adhesive: Scotch ATG, Glue Dots, Gel Pen: Sakura
Thanks for stopping by!
Comments are appreciated, but I must apologize for the word verification. I have had an increase in spam lately.
Here Kitty, Kitty, Kitty...
Have you created a card based on Kathy's sketch over at the The Sketch File? There's still time to play.
Hop on over to see what Kathy created. You'll love it!
This is my second card based on Kathy's sketch. I decided to keep my card pretty simple. I stamped several images of cats, fussy cut around them and added a bow. I lined them up in a row and adhered them to the mat with dimensional adhesive. For the background on the mat, I used the stamp pads and lightly inked the stamp pad image all over the white cardstock. This created overlapping circles. I inked around the outer edges of the mat and added the horizontal banners and a vertical strip that I wrapped in embossing thread. I also added two brads to this strip before adhering it over the banners.
I'm hope you'll join us over at The Sketch File. We'd love to see what you create with Kathy's sketch!
Supplies:
Cardbase: Paper Studios
Cardstock: Recollections
Cat Stamp: Stamp Works
Ink: Studio G
DMC Embroidery Thread
Brads
Adhesive: Scotch ATG, Scrapbook Adhesives 3D Foam Squares
ALSO...I'm getting a lot of SPAM lately so I had to turn on word verification. I apologize for the inconvenience and just want you to know that I really appreciate your visits and comments. Thanks!
Thursday, March 7, 2013
Square Dance
The latest sketch from Kathy at The Sketch File is up and ready to play with and it's all about squares. For my card I used a punch to create a series of squares at the bottom of a cream colored piece of cardstock. I adhered it to a cardbase with dimensional adhesives and then added punched cars and sailboats. I added horizontal strips of layered paper to the upper right hand corner and used a vertical strip with brads to finish it. This is an easy sketch to use and the possibilities are endless. Why not see what you can create based on the sketch and share it with us over at The Sketch File...we'd love to see what you create!
Supplies: Cardbase: Paper Studios, Cardstock: Paper Studios, Recollections, scraps from my stash, Punches: EK Success, Adhesive: Scrapbook Adhesives 3D Foam, Scotch ATG
Thanks for stopping by!
Tuesday, March 5, 2013
Embossed Metal Birthday
Unscripted Sketches is having it's 200th challenge...wow! It addition to using the sketch, there is an optional piggy back challenge (make something other than a card), which I did not choose. Instead I focused on the sketch and reached from my embossing metal and my texture templates. I punched squares from silver, gold and copper colored metal and embossed each with a different pattern. Next I cut a rectangle and embossed it with a fifth pattern. I adhered all the embossed pieces of metal to a piece of black cardstock and trimmed around it. For the background, I used a piece of metallic patterned paper which I cut and matted on black cardstock. I adhered these pieces to a cardbase and finished by writing Happy Birthday on black cardstock with a gold marker. I really love all the textures and have the the perfect recipient in mind for this card.
Supplies:
Cardbase: Paper Studios
Cardstock: Recollections
Metallic Paper: Hygloss
Metal: Amaco Art Emboss
Marker: EK Success
Texture Plates: Fiskars
Adhesive: Scotch ATG
Supplies:
Cardbase: Paper Studios
Cardstock: Recollections
Metallic Paper: Hygloss
Metal: Amaco Art Emboss
Marker: EK Success
Texture Plates: Fiskars
Adhesive: Scotch ATG
Sunday, March 3, 2013
Twined Candy Canes

TWINE ME UP is the current challenge at 365 Cards. The challenge is to create a card with at least two different colors of twine or jute. I chose to use green and red twine to create another Christmas card. I started by cutting two candy canes from thin cardboard and then wrapped each in twine.Using red ribbon, I tied them together and finished with a bow. Then I adhered them to a piece of polka dotted paper and matted this on red paper. On white cardstock, I stamped "merry wishes" with green ink and cut it into a banner shape. This banner was attached with dimensional adhesive to finish the card.
Supplies: Cardbase: Paper Studios, Patterned Paper: MME, Twine: The Twinery , Ink: Memento:Bamboo Leaves, Ribbon: Offray, Adhesive: Scotch ATG, Elmer's Glue Spots
Friday, March 1, 2013
Merry Wishes...From Our House to Your House

The challenge at Jingle Belles is STICK-Y and SWEET. So I created this card shaped like a gingerbread house with peppermint sticks and candy. To create the candy cane sticks, I cut red paper into a 1/2" strip and then cut diagonally into smaller bits. I glued these red bits to a 1/2" strip of white cardstock and added glittered glue over the red areas. I hand cut a house shape from a piece of Kraft cardstock, then adhered the canes. Next I created the candies that line the roof. I punched the green and red pinwheel like portions from cardstock, glued them to white cardstock and then used a circle punch to punch over them creating candies. Using a brown colored pencil and a ruler I added horizontal lines to create the siding on the house. I adhered the green and white candies along the roof line and created "sugared icicles" with clear glittered glue. With green glittered glue I created a few gum drop shapes at the base of the house. I added windows with white paint, created window panes with the clear glittered glue and then cut out a door. Around the outside of the door, I added small red dots (cinnamon candies) and a handmade wreath. I used a folded piece of brown cardstock to create the steps. Next, I hand cut a small gingerbread man from cork and painted on a Santa suit. I finished by stamping "merry wishes" onto Kraft cardstock, cut it into the shape of a banner, inked around the edges and adhered it with dimensional adhesive. Inside the card I added a white house that I matted with red cardstock. In the center of the cardstock, I wrote: "From Our House toYour House". Since there is so much detail on this card, it will definitely be one of a kind. It would take far too long to mass produce this one.
Supplies:
Cardbase: Kraft ?
White/red/green cardstock scraps
Brown cardstock: Core'dinations
Colored pencil: Crayola
Punch: Pinwheel: Marvy Uchida, Circle: EK Success
Cork
Adhesive: Scrapbook Adhesives 3D Foam, Scotch ATG, Scotch Quick Dry Adhesive
Stamp: Stampin' Up
Ink: Tim Holtz
Glitter Glue: Studio G, Horizon,
Paint: Duncan: Scribbles Glittering Crystal & Shiny White, Polymark: Red
Wednesday, February 27, 2013
Warm Winter Wishes
The guest designer over at MUSE is Deana Jean from Kloset Kreations. She has created a gorgeous card to inspire us. I was drawn to the collection of flowers in the upper corner of her card. I loved how her sentiment looked like it was tucked behind the flowers. This reminded me of a pocket. So I decided to create a pocket. I stamped snowflakes on blue cardstock, punched holes around the edge and threaded a piece of string through the holes ending in a bow in the center of the pocket. I adhered this to a cardbase that I had printed text on and then tucked two hand made mittens into the pocket. Inside the sentiment reads....Warm Winter Wishes.Supplies:
Cardbase: Paper Studios
Cardstock: Scrap piece of blue
Crimper: Marvy Uchida
Trim: white...bought at a garage sale...no label
Circle Punch: 1/8" hand held
Snowflake Punches: Tonic Studios, EK Success
Computer: Printed text
Mittens: Hand cut
Adhesive: Scotch ATG
Sunday, February 24, 2013
Have a Holly Jolly Christmas
This is my second card today. This one has a felt focal point and is for the felt challenge over at 52 (Christmas) Card Throwdown. I hand cut the holly leaves and berries from felt, then used my Fiskar's Fuse to die cut the white felt background. I adhered the leaves to the felt, then adhered the white felt to the green mat. Next I punched holes in the green cardstock along the edge of the white felt. I finished by writing "Have a Holly Jolly Christmas!" inside.
Supplies:
Cardbase: Paper Recollections
Cardstock: DCWV
Felt
Fiskar's Fuse Die Cut
Hole Punch
Marker: American Crafts
Adhesives: AdTech Hot Glue Gun, Scotch ATG
Supplies:
Cardbase: Paper Recollections
Cardstock: DCWV
Felt
Fiskar's Fuse Die Cut
Hole Punch
Marker: American Crafts
Adhesives: AdTech Hot Glue Gun, Scotch ATG
Season's Greetings
My inspiration for today's card comes from the view out my craft room window. We are in the midst of snow flurries here. The wind is howling and the snow is flying. Although there isn't anyone carrying a tree home, the weather seems perfect for it. The focal point for this card was created from felt. Using felt is the current challenge over at 52 (Christmas) Card Throwdown. So, I began by hand cutting the person and tree from pieces of felt. I adhered the pieces together with hot glue and added highlights and detail with markers. For the snow I used layers of torn white cardstock and matted this onto a piece of blue "snow" patterned paper. Inside the card, I simply wrote Season's Greetings!
Supplies:
Cardbase: Paper Studios
White cardstock: Paper Recollections
Felt
Ad Tech Hot Glue
Markers: American Crafts, Galaxy, EK Success
Adhesive: Scotch ATG
Wednesday, February 20, 2013
It's Got Rhythm
Inspiration for this card came from the current challenge at the MUSE Card Club. The goal is to create a card based on an inspiration card created by Marion Vagg. Marion created a colorful, patterned card with a bright cheerful feel. I wanted to create a card that evoked the same happy feeling. In addition to the bright, cheerful colors, I loved her placement of her patterned papers...they seem to have rhythm. I wanted to replicate that rhythm, so I placed alternating patterned papers horizontally. I really liked the orange diamond shapes and the chevrons on Marion's patterned papers. I didn't have a patterned paper with the same bold, bright feel, so I cut a blue striped piece of paper with decorative scissors (to give it a similar chevron pattern on the edge). I backed these blue striped pieces of paper with a bright green colored cardstock and repeated the chevron edge by cutting it with the decorative scissors. To create a diamond pattern in the center of the blue striped paper, I punched squares and then turned them on end and adhered them. The decorative tape with the floral pattern gave me a second pattern to alternate with the blue striped paper. I adhered this cream colored decorative tape to a piece of the same green cardstock that I used to mat the blue striped strips. The tape was somewhat translucent and allowed some of the green color to come through. This added just the right touch and the new color worked well with the other colors. I positioned my sentiment in the same corner as Marion placed hers, however, I used a banner and stamped the sentiment instead.
Supplies:
Cardbase: Paper Studios
Punch: Family Treasures
Ink: Tsukineko: Brillance
Stamp: Stamp' in Up
Patterned Paper: Great Paper Co.
Decorative Tape: Darice
Green Cardstock: Bazzil
Supplies:
Cardbase: Paper Studios
Punch: Family Treasures
Ink: Tsukineko: Brillance
Stamp: Stamp' in Up
Patterned Paper: Great Paper Co.
Decorative Tape: Darice
Green Cardstock: Bazzil
Sunday, February 17, 2013
Shades of Green
I gave my Tim Holtz Flutter stamp another workout with this card. I stamped the image onto white cardstock using green ink then trimmed around it leaving a slight border. I matted this image on piece of green cardstock and adhered it to a cardbase. I added the gorgeous green ribbon to anchor the mat and finished by adding the pearls.
Supplies:
Cardbase: Paper Recollections
Stamp: Tim Holtz, Flutter
Ink: Momento
Green mat: from scrap stash
Ribbon: ? I won it and it didn't come on a spool
Pearls: Queen & Co.
Adhesive: Scotch ATG
It's Beginning to Look A Lot Like...
This is my third card based on the sketch I created for Jingle Belles. In my previous post HERE, I explained that I am a guest star at Jingle Belles this week (so exciting!) For this card, I let my imagination run wild and came up with this rather silly card with a Santa suit and hat to represent the main elements in the sketch. Can you still see the sketch in this creation? The Santa suit was so easy to make. I grabbed some felt, cut it into the shape of a hat and suit and then used some polyfill to add faux fur. In addition, I hand cut a belt from some scrap pieces of black cardstock, folded it around the suit and adhered it with glue dots. I used MS Word to print my sentiment on white cardstock, cut around it in the shape of a banner and matted it on black cardstock. Of course, I wrote "Christmas" inside the card to complete the sentiment.
Supplies:
Cardbase: Paper Studios, Patterned Cardstock: MME 12 Days of Christmas,Black cardstock: from my scrap stash, Whole punch, Polyfill, Red Felt, Adhesive: Elmer's Glue Spots, Scotch ATG
THANKS SO MUCH FOR VISITING!
If you were inspired by the sketch, please link up your card over at JINGLE BELLES!
Saturday, February 16, 2013
Flutter, Flutter
Supplies:
Cardbase: Paper Studios
Cardstock: Paper Recollections (black), K&Co.
Stamp: Tim Holtz, Flutter
Ink: Momento
Paper punch
Pearls: Queen & Co
Trim
Adhesive: Scotch ATG
I appreciate your visits.
Thanks so much!
My Love for You...
This card came together very quickly. I stamped the image of the watering can, punched the hearts to create the flowers and drew in the stems, grass and "pouring" hearts. The sentiment finishes with... just grows and grows.
Supplies:
Cardbase: Paper Studios
Stamp: Studio G
Marker: Zig Memory
Heart Punch: Troll
Colored Pencil: Crayola
Cardstock: Paper Recollections
Adhesive: Scotch Quick Dry, Scotch ATG
Supplies:
Cardbase: Paper Studios
Stamp: Studio G
Marker: Zig Memory
Heart Punch: Troll
Colored Pencil: Crayola
Cardstock: Paper Recollections
Adhesive: Scotch Quick Dry, Scotch ATG
THANKS SO MUCH FOR
STOPPING BY
& FOR LEAVING A COMMENT.
Friday, February 15, 2013
My Sketch at Jingle Belles

Today I am honored to be a guest star over at Jingle Belles. I have enjoyed participating in the challenges there and was thrilled that Lauren and Steph agreed to let me share a sketch with you. I hope you will find the sketch inspiring and will create a card to share HERE.
I created two cards based on the sketch. The more interesting of the two is the snowman card, which is a little more creative and uses the sketch more loosely. For the second card I stuck closely to the elements and layout of the sketch. Do you prefer one over the other? Either way, I hope you'll take a moment to visit the Jingle Belles blog and join in on the challenges. I've loved participating in the challenges. And the best part....If you participate regularly, when December rolls around you'll have plenty of cards to mail to friends and family! No more assembly line card making for me!
Snowman Card Supplies:
Cardbase: Fox River Paper Co.
Cardstock: Paper Recollections, MME (Scarf)
Snowman punch: Martha Stewart
Snowflake Punch: Tonic Studios
Adhesive: Scotch Quick Dry, Scotch ATG
Tree Card Supplies:
Cardbase: Paper Studios
Cardstock:Fox Rive Paper Co
Star Punch: EK Success
Adhesive: Scotch Quick Dry, Scotch ATG
Sketch created with MS Paint
Paper Crimper: Marvy Uchida
THANKS SO MUCH FOR VISITING!
Saturday, February 9, 2013
Hanging Hearts
Supplies:
Cardbase: Paper Studios
Cardstock: Core'dinations Vanilla Cream, Red (scrap pieces)
Thread: DMC
Heart Punches: EK Success, Troll
Circle punch: EK Success
Stamp: Market Street
Inks: Versamark ink pad, Page Craft
Adhesive: Scotch Quick Dry, Scotch ATG
Friday, February 8, 2013
My Take

Supplies:
Cardbase: Paper Recollections
Cardstock: Bazzill
Punch: Stampin' Up
Felt
Ribbon: Oriental Trading
Stamps: Studio G
Versamark Stamp Pad
Adhesive: Scotch ATG
Let it Snow!
Some of you may not have the same wish for snow that I currently have but we've had very little moisture this winter and we are in desperate need of snow. With that thought in mind and the current snow, sleet, rain challenge at Jingle Belles I couldn't resist making a card about snow. To create the card base, I took a 12 x 12 sheet of white cardstock and scored it at 4" and 8". Then I accordion folded it and tore a portion off starting at the back top edge and tearing towards the bottom front edge (diagonally). I used a computer to print the sentiment. Then I used a blue colored pencil to add some dimension and interest around the edges. I punched three large snowflakes and a bunch of smaller snowflakes. I layered the three large snowflakes and covered all the snowflakes with clear iridescent embossing powder.
Supplies:
White Cardstock: Paper Recollections
Colored pencil: Crayola
MS Word Font: Bradley
Snowflake punches: Emagination, EK Success
Embossing Powder: Darcie's Country Folk Clear Iridescent
Adhesive: Scotch ATG, Scotch Quick Dry, Scrapbook Adhesives Foam Tape
Supplies:
White Cardstock: Paper Recollections
Colored pencil: Crayola
MS Word Font: Bradley
Snowflake punches: Emagination, EK Success
Embossing Powder: Darcie's Country Folk Clear Iridescent
Adhesive: Scotch ATG, Scotch Quick Dry, Scrapbook Adhesives Foam Tape
Wednesday, February 6, 2013
Blue Buds
Yesterday was "clean up my desk" day in my craft room. I had bits and pieces of things that I had set aside for one reason or another. When I came across these blue buds, I knew it was time to use them. Also, in that same pile of bits and pieces, I found the black mat and the white punched circle. So, I challenged myself to use them on a card. I kept it pretty simple. I adhered the blue buds onto the white circle, clumping them together and matted these onto the black rectangle. I added the white dashed line with a gel pen along the outer edges of the black mat. I didn't add the sentiment. This is one of those all occasion cards and I'll add it when I decide how I want to use it.
Supplies:
Cardbase: Paper Studios
Cardstock: scrap pieces
Stamps: Market Street
Markers: Bic Mark Its, Gallaxy (white)
Gel Pen: Sakura
Adhesive: Scotch Quick Dry, Scotch ATG
Supplies:
Cardbase: Paper Studios
Cardstock: scrap pieces
Stamps: Market Street
Markers: Bic Mark Its, Gallaxy (white)
Gel Pen: Sakura
Adhesive: Scotch Quick Dry, Scotch ATG
THANKS SO MUCH FOR VISITING!
Tuesday, February 5, 2013
Bicycle Card
I made this card just for the fun of it. For this card, I tried to keep the bicycle as the focal point and to limit embellishments to just the patterned paper and the faux stitched line and inked edges.
Supplies:
Cardbase: Paper Studios, Cardstock: Paper Recollections, Core'dinations, Text: MS Word (random words), Stamp: Studio G, Gel Pen: Sakura, Ink: Tim Holtz, Adhesive: Scotch ATG
Thanks so much for visiting!
All Stitched Up
Kathy has the February sketch up over at The Sketch File. When I first saw it, I was somewhat hesitant because of all the layers. But I was ready for a challenge and reached for some MME Antique Dot paper. I had bits and pieces left over from other projects so this was a perfect card to use up some scraps. Once I decided on the patterned papers, I cut a large circle and layered the other bits under it. I ended up using my sewing machine to stitch the pieces together and then adhered them to the card base. You probably can't tell from the photo, but the flowers are layered and have a bit of dimensional adhesive between the layers.
So are you feeling inspired? Want to play along? Please check out the current challenge and other DT member's projects over at The Sketch File. We'd love to have you play along with us.
Supplies: Cardbase: Paper Studios, Patterned Paper: MME Antique Dots, Cardstock: yellow scraps, Punches: Flower: EK Success, Leaves: ? (no name on it), Sewing Machine: Janome, Colored pencil: Crayola, Adhesives: Glue Dots, Scotch ATG, February Sketch: Kathy Waffle's The Sketch File
So are you feeling inspired? Want to play along? Please check out the current challenge and other DT member's projects over at The Sketch File. We'd love to have you play along with us.
Supplies: Cardbase: Paper Studios, Patterned Paper: MME Antique Dots, Cardstock: yellow scraps, Punches: Flower: EK Success, Leaves: ? (no name on it), Sewing Machine: Janome, Colored pencil: Crayola, Adhesives: Glue Dots, Scotch ATG, February Sketch: Kathy Waffle's The Sketch File
Flower Power

This very simple card was inspired by the current sketch at Sunday Stamps. I started by stamping the text. I have a collection of stamps with the names of flowers on them. I stamped these flower names onto a piece of white cardstock using a green ink. After the ink had dried, I punched flowers in two different sizes and used a colored pencil and ink to add more detail. I cut a banner from green cardstock and wrote the sentiment with a black marker. I adhered circles that I had punched and inked to the center of each flower. On the outside edges of the white panel, I used a colored pencil to add stitch lines. This panel was matted onto a piece of green cardstock and then the card base.Supplies:
Cardbase: Paper Studios
Cardstock: DCWV, Paper Recollections
Stamps: Flower Names (?)
Punches: EK Success
Ink: Memento: Bamboo Leaves
Marker: Sakura
Adhesive: Scotch Quick Dry, Scotch ATG
Sunday, February 3, 2013
Heart Trio
This is my second card based on the February sketch at 52 (Christmas) Card Throwdown. I wanted to try another card with the same sketch, but this time I created a Valentine's Day card rather than a Christmas card. I punched three dark brown hearts, added pieces of zig zags/Chevrons that I cut from patterned paper and adhered them to the heart panel. I added a strip at the bottom with a layer of cream cardstock, brown and a chevron. Finally I added the two bows between the hearts.

Supplies:
Cardbase: Paper Studios
Patterned Paper: Fancy Pants: Country Boutique
Cardstock: Core'dinations
Heart punch: EK Success
Adhesive: Scotch Quick Dry, Scotch ATG

Supplies:
Cardbase: Paper Studios
Patterned Paper: Fancy Pants: Country Boutique
Cardstock: Core'dinations
Heart punch: EK Success
Adhesive: Scotch Quick Dry, Scotch ATG
Trio of Trees
52 (Christmas)Card Throwdown has posted a new sketch for February. I decided to see what I could come up with and ended up creating this card. I started by hand cutting the three trees from white cardstock. I adhered them to the green panel, then added the hearts between each tree. Next I added a bit of ribbon and finished by printing the sentiment on white cardstock.
Thanks for stopping by!
SUPPLIES:
Cardbase: Paper Studios
Cardstock: Paper Recollections. DCWV: Green
MS Word
Ribbon
Heart punches: Troll/?
Adhesive: Scotch ATG, Glue Dots
Thanks for stopping by!
Subscribe to:
Posts (Atom)