Tuesday, June 24, 2014

The Bells of Saint Mary's

Last night I had the pleasure of revisiting a few scenes from an old movie called "The Bells of St. Mary's". It's a story about a priest (Bing Crosby) and a nun (Ingrid Bergman) who put aside their differences to save an inner city school on the verge of being condemned . As I was watching scene after scene, my mind was flooded with wonderful memories of my mother and I enjoying this movie together. I guess you could say it was a tradition for us. We always looked forward to watching it together.  I watched scenes from the movie in order to get inspiration for the Christmas Story/Movie card challenge at Jingle Belles.  I love this prompt!!!  It was suggested by Irene from A Serendipitous Retirement. Although the movie isn't a traditional Christmas movie, I remember it being broadcast around Christmas time and enjoying the wonderful songs sung by Bing Crosby. There is a scene where the children perform a Christmas play and also one where Bing and the children sing "Adeste Fidelis", which may be one of the reasons why it was broadcast in December.  The inspiration for the card came from the scene where Bing Crosby and the nuns sing "The Bells of St Mary's". I must have listened to it a half a dozen times before I sat down to create my card. Bing's voice is just so incredible!  Anyway, I pulled out my acrylic paints and hand painted the bells onto a piece of black cardstock then fussy cut around  them and mounted them with dimensional adhesive onto black cardstock. I decided to use a black background and a white cardbase because the film was created in 1945 and was broadcast in black and white and of course the priest and nuns wore black and white. The red ribbon and green bows add the much needed color.

Thanks for stopping by! Have a great day!

Sunday, June 22, 2014

Believe

In my previous job at a public library, I worked in the Children's Department as a storytime reader/planner. I sooooo enjoyed reading wonderful books to children as well as planning crafts, songs and fingerplays based on the theme of the books. One of my favorite themes to plan was Christmas. There was always an infinite number of wonderful holiday books to read but I always struggled to narrow the choice down to just three or four books. Earlier today I found myself browsing through my personal collection of Christmas books.  Why am I doing this in June? It's because the challenge at Jingle Belles is to use a Christmas story or movie as a prompt for creating a Christmas card. Isn't that just an extraordinary prompt?

For once, it didn't take me long to pull a Christmas book off the shelf and once I leafed through the pages I was in craft mode! I used a die to cut the bell and used punched boughs to frame it.  This isn't the card I had intended to make....more about this later.

So have you guessed which book I used as a prompt?  I chose a book by one of my favorite children's authors.  The book is also a very popular movie. The book that prompted my card is The Polar Express by Chris Van Allsburg?  Chris Van Allsburg just happens to be on my list of favorite children's authors and the movie features the voice of Tom Hanks (a favorite actor...I don't think I've ever seen a movie that starred Tom Hanks that I didn't like!)  Back to the card...

As I mentioned before, the card I had in mind isn't the one I created. As I began creating my card, my initial thought was to create a card that incorporated both the jingle bell and a ticket with the word "Believe" punched from cardstock to represent the ticket Tom Hanks punches and hands to the "Hero Boy". I made the ticket, carefully punching the letters to spell out the word "believe" but in the end it was somewhat difficult to read and it was too big to use along with the bell. So I scratched that idea and just included the strip with the word "believe" printed on small circles.

It's time to head back to the bookshelf to see what other Christmas Stories will inspire a card.  A special thanks to Irene from A Serendipitous Retirement who suggested this fabulous prompt for a Jingle Belles challenge!!!!

Saturday, June 14, 2014

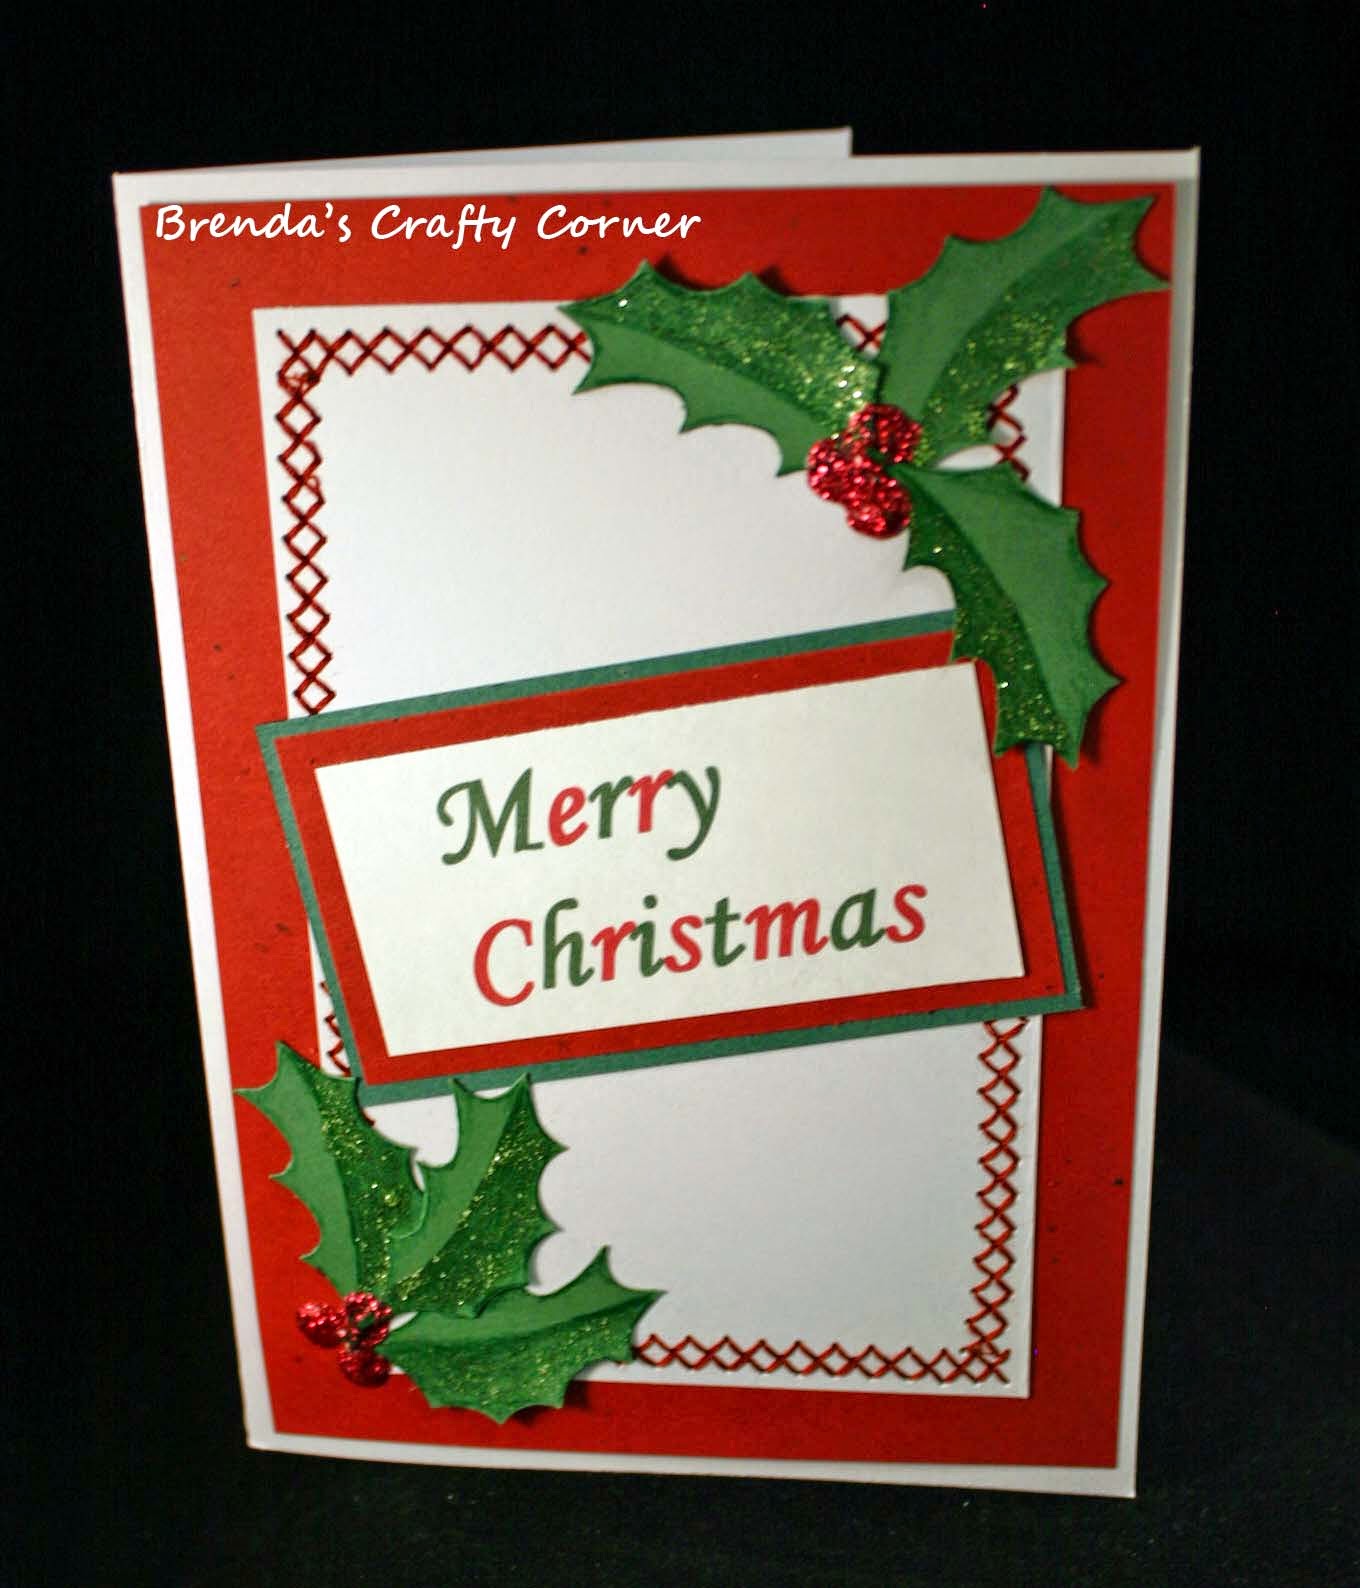
Holly Christmas Card

Hmmmm....I seem to be in a crafting mood today. This is the third card I've created today and the night is still young! I guess I have been inspired by the RED & Green Christmas card challenge at Jingle Belles. If you've been following my blog, you know that I've already posted two other cards for the same challenge. I couldn't resist creating just one more.  To create this card, I punched holly leaves, added detail with glitter and then mounted them on a piece of white cardstock. Before adding the holly, I used my sewing machine to stitch the white cardstock to the red cardstock. I printed the red and green greeting on my computer and layered it on red and green cardstock.  I wish I had printed it directly onto the white stitched cardstock, but I didn't think of that until I had already stitched the layers together.

NOEL: RED & GREEN

This is my second Christmas card with a RED & GREEN theme. It's the current prompt at Jingle Belles.  

I kept this card pretty simple by hand cutting the word NOEL from red and green cardstock and adhering the letters to red and green squares. I also added tiny dots of red and green glitter and a silver foil snowflake to each square. (Sorry about the quality of the photo. My camera doesn't like the combo of white and metallic.)

RED & GREEN

Lauren & Steph, the clever and crafty duo over at Jingle Belles, have us thinking about the traditional colors of Christmas: RED & GREEN. It's the perfect prompt for a Christmas card challenge.  A quick search through my Christmas paper stash revealed this red, green and white patterned paper with circles. I used it as the starting point for my card and continued the circle and red and green themes by punching several white circles, adding handcut lettering,  red and green polka dots and a glittered green or red trim.

Supplies: Cardbase: Recollections, Patterned Paper: Oriental Trading(???), EK Success Circle Punches, Cardstock: Recollection, Scotch Quick Dry Adhesive.

Tuesday, June 10, 2014

Dragonflies for The Sketch File

When I was a child, I loved the combination of pink and black. I remember using the combo to create with construction paper and when coloring pages in coloring books.  With this in mind, I decided to use that same combo along with our June sketch at The Sketch File.  Although I love Kathy's sketch, this is one of those cards that just didn't come together for me. It seemed the more I worked with it, the less I liked it. I finally gave up. Perhaps it's the shades of pink I've used or maybe it's the dragonflies, I'm not sure, either way, it didn't turn out how I wanted it to. But, there's good news! There are two other very creative DT cards to inspire you, just stop by The Sketch File and take a peek at Kathy and Jackie's cards then share your creation by linking it up with us.

Tuesday, June 3, 2014

Rainbow Flower Pennant

It's June and we're excited to be starting a new month over at The Sketch File. A new month means it's time to share the new June sketch. This month Kathy's sketch has us working with panels and pennants. It's a super fun sketch to play with and once I saw it, I knew immediately what I wanted to do. I started by creating the rainbow flower in my pennant.  Using white cardstock, I punched the flower then adhered various colored bits of cardstock behind each petal. I punched a second flower in another crackle embossed pennant and layered it over the top of the first using dimensional adhesive. I like the way this added dimension to the flower. Behind the pennant I added an embossed green panel with a bow at the base and layered this onto a green mat and then the cardbase.  Since the card still needed a bit more, I pulled out a pair of decorative scissors to cut along the bottom edge of the card.

It was a super fun card to make and I really enjoyed the simplicity of Kathy's sketch.  What do you think? Are you ready to be creative with our latest sketch? If you still need a bit more inspiration, there are more cards posted by other DT members. Just hop on over to The Sketch File to take a peek. We're looking forward to seeing how you use this sketch.

Monday, May 26, 2014

Tropical Paper Bag Mini

Do you love to create mini albums? I love to create them but often I make them for myself and am very slow about actually adding photos. This past year has been different. I have made eight different albums to be given as gifts. Two of the albums I made are paper bag "tropical" mini albums, each with a slightly different cover and slightly different inside pages. I am sharing both covers and the inside pages of just one of the albums. I created them both as gifts for two of my nieces. My inspiration came from Tracy at the The Paper Crafter's Library. She created a very similar album. Sadly, even though I was really eager to create may own tropical album I  couldn't bring myself to do.  When I purchased the Graphic 45 Tropical Traveloque paper collection it was sooooo gorgeous I didn't want to cut into any of the papers. I put it aside for a VERY long time (so long that I don't think the collection is available any longer and I think I saw Tracy's video in April of 2012!). Then I learned that one of my nieces would be living in the Caribbean and a second would be visiting her. So I just had to take the plunge and get creative with these gorgeous papers.   I hope you enjoy looking through the album. I am so glad I finally got around to doing them.
To create the netting used throughout the album, I used cheese cloth that I dyed brown with walnut ink.  I also dyed some white cord with the same walnut ink and incorporated a bit of twine on the tags and for the binding.
I used a hot glue got to attach the tiny shells. I hope that it holds the shells in place permanently!
 I also created protective sleeves for each page. I simply cut larger page protectors down to fit the page size of my album pages (about 7" x 9") and used my sewing machine to stitch the edges together.


I used embossing powder to create the sand on the inside of the front and back covers.
 I attached bands around the black mats on the inside pages, only adhering them to the back of the black mat so that photos can slide under the edge of the band.
I wanted to add some journaling cards with lines, so I used my computer and printer to create lined paper.
These albums were so fun to create and the best part is that I was able to give them as gifts. I can't wait to see the albums filled with photos taken by my nieces.

As I mentioned earlier, I was inspired to create this album after watching a video from The Paper Crafter's Library. If you haven't visited the The Paper Crafter's Blog, I encourage you to do so.  You will have free access to the blog, but will also have the option of becoming a paid member and you will have access to the most incredible source for crafting videos and tutorials!

Happy Crafting and THANKS for visiting!

Sunday, May 25, 2014

Peace on Earth Scene


I'm celebrating PEACE with Lauren & Steph over at Jingle Belles. They are suggesting that we use the PEACE symbol or the word PEACE on our cards. For this card, I created a snow scene on black cardstock. First I used torn paper to create snow, then  I added a full moon to the night sky along with a few chalked in clouds and stars that I created with a gel pen.  I cut the image in half to create two inchies and adhered them onto a snowflake embossed mat. I printed PEACE on Earth on white cardstock, cut it into a banner shape and adhered it below the snow scene.


Peace on Earth

It's time to celebrate PEACE. The very talented and creative ladies (Steph & Lauren) over at Jingle Belles are asking us to celebrate PEACE by using the word or symbol on a holiday card. I decide to use both.

This is one of those cards that sort of evolved as I was creating it. I sat down to create but really had no idea where I was going with it. In the end I created a PEACE symbol by cutting up an image of the earth. I separated the bits, leaving a gap between the pieces in order to create the peace symbol. I layered them behind a circle frame and printed the sentiment above the circle opening. I finished by adding the snowmen and snow at the base.

Wednesday, May 21, 2014

May Sketch~Second Card

This is my second card for our fabulous May sketch at The Sketch File. Kathy has us thinking about oval layers and I had a blast coming up with the theme for this card. I handcut a moon from light yellow cardstock and added yellow chalk to create a bit of dimension and shading. The stars were left over from a previous project. I just added a bit of wire around the largest star and layered all the stars in the lower right hand corner. Behind the moon I added oval layers and used a punch to create a star border in the dark blue layer.

I enjoyed working with the sketch and think you will too. I can't wait to see what you create.  If you need more inspiration, you can hop on over to the The Sketch File to see Kathy's gorgeous card as well as another version of the sketch.

Saturday, May 17, 2014

Floral Card in a Box

This is one of several Cards in a Box that I've created over the past few months. They are fun to create and each one ends up being unique. If you'd like to visit Frenchie at Stamp & Scrap with Frenchie, she has a fabulous tutorial. They are really quite simple to create once you have all the measurements. Although this one turned out nicely, I am itching to create another that doesn't have a floral theme. I've created two others with a floral theme and one with balloons, but it's time to consider some other options.

Thanks for stopping by the blog! 

Hope you enjoy your weekend!

Tuesday, May 13, 2014

OVAL LAYERS

Kathy has launched the new May Sketch at The Sketch File. It's a beauty and one I hope you will enjoy using it as much as I did. This time we're playing with oval layers.

Honestly, I really wanted to just recreate her sketch with the lovely hearts at the base. It's so, so appealing! Instead I went with a floral theme and decided to keep my color palette simple, using only three colors (red, white and green). I layered a white scallop edged oval and two red ovals over a white floral embossed mat and adhered them to red cardbase. To add bit more texture, I embossed the top, red, oval layer with small dots. The flowers at the base of the ovals are the same floral images that I used on the white embossed mat. I embossed the floral images on red and white cardstock and cut around each flower, layering the red over the white. Since my images are flowers, I used leaves instead of swirls, adding an embossed line down the center of each and folding them slightly to add a bit of dimension.

So, are you inspired and ready to be creative? I hope you will take a few minutes to play with the sketch then link up your creation with us. See you at The Sketch File!

Saturday, May 3, 2014

More Layers

My final card for the Three or More Layers challenge at Jingle Belles is this multi-layered tree card. I think this one will need additional postage...it's a bit heavy! I started by cutting a rectangular piece of white cardstock into pieces and adhering the pieces in mosaic fashion to a black cardstock mat. I added a second green mosaic pattern on top of the white, then a red mosaic on top of that one. Before adhering the red onto the green, I punched stars randomly through each piece. Using green cardstock, I cut out pieces to create a tree shape, adhered them in layers, wrapped the tree with wire, adhered punched stars and added a black mat.

Supplies: Cardbase: Recollections, Carstock: Recollections, Bazzill, Star Punch, Craft wire, Star button, Scotch ATG, Scotch Quick Dry Adhesive.

Multi-Layered Revisited

This is my second card for the multi-layered (at least 3 layers) challenge at Jingle Belles. This card simply has layered stars, some single layered, others with two layers, all adhered to a green mat. I used a star shaped punch to add a few more stars to the mat, then backed the green mat with a white mat. I wrapped all the layers with a bit of green wire and added a strip of stars along the left edge. The good news is that this card came together quickly because the stars were already die cut and sitting on my craft table. They were left overs from another project.

Supplies: Cardbase: Bazzill, Cardstock: Bazzill, small star punch, Scotch ATG, GoCrafts dies, Imaginations Paper Crimper, Darice Embossing folder, Craft wire

Multi-Layered

I am one of those people that struggle with multi-layered cards. I find that I am never happy with my many layers once I start layering them on. However, since the challenge at Jingle Belles is to use at least three layers on our cards, I just had to give it a shot (make that several shots). This is the first of three cards that I've created. For this card, I started by stamping the tree image on white cardstock. To add a bit of interest, I cut it into unequal thirds and punched small holes in each. I layered the white cardstock onto red. I love how the red dots stand out against the white cardstock. I also added two additional layers by including both a green and red mat. Stay tuned for yet another post with my second card.

Supplies: Cardbase: Bazzill, Cardstock: Bazzill, DCWV, small hole punch, Hampton Arts Tree Stamp, Offray ribbon, Scotch ATG.


Tuesday, April 22, 2014

Shaker-Like Window

I've got one more card for the JOY to the EARTH challenge at Jingle Belles. Our challenge is to recycle, re-use, re-purpose or up-cycle when creating a card. For this card, I used a cellophane bag printed with holly leaves. I bought the bags several years ago but found out that not all the bags were actually bags. A few were not sealed along the sides. I set them aside to use for craft projects like this card. I folded a piece of the cellophane in half, glued two of the edges together and added torn tissue paper that had once lined a gift basket. I sealed the last edge and framed my newly created window with a piece of green cardstock. It reminds me of those cards you see with the shaker style window, but my bits of tissue don't move around. I punched out a few holly leaves and berries and added detail with chalk and a gel pen and attached them to the lower corner of the frame. I printed the sentiment on a piece of cardstock, cut it into the banner shape and matted it with green cardstock.  Now I'm wondering what other projects I can create with the remaining printed cellophane.....hmmm...I'll have to give it some more thought.

Supplies: Cardbase: Recollections, Cardstock: Bazzill, DCWV, Cellophane bag: ??, Sakura gel pen, Scotch ATG, Spellbinders Die, Emagination Holly Punch, Ek Success circle punch, chalk, Microsoft Word.

Tuesday, April 15, 2014

Cork Tree

This is my second card for the recycling, up-cycling challenge at Jingle Belles. For this card, I carefully sliced a wine cork and adhered the slices to a piece of red cardstock in the shape a tree.  I used Styrofoam for the snowflake/hail. It was from the packaging in a box. You know those tiny balls of Styrofoam that always cling to everything when you unpack a box. I had those tiny bits clinging to me earlier today and decided to put them to use. For additional snow, I recycled a wet one or clean wipe. I had used it to clean some chalk off my desk top. Once it had dried, there was still a fair amount of clean white space left on it, so I tore it to use as the snow at the base of the tree.

Thanks for the fun challenge, Lauren & Steph!

Supplies: wine cork, used clean wipe, Styrofoam packaging, Queen & Co Gems, Scotch Quick Dry Adhesive, Scotch ATG, Bazzill & Recollections cardstock, Cardbase: Recollections.

"Joy to the Earth" Challenge

Have you seen the Earth Day challenge at Jingle Belles?  It's all about recycling or up-cycling, which I always find fascinating because it's a makes me look at things in a whole new way. I began by going on a search around the house and gathering up a few supplies: cardboard, netted fruit bag, foil candy wrapper.  First, I carefully peeled off the outer red layer of the cardboard to reveal the corrugated surface. I lightly inked the corrugated surface and outer edges before attaching a piece of a netted red fruit bag. Next I cut an ornament shape from the red paper that I peeled off from the cardboard.  To decorate it, I used the foil from a candy bar wrapper. One side of the foil was gold with a bit of writing on it and the other side was silver. Since I didn't want the writing on the gold side to show,  I folded, then twisted the foil before adding it to the ornament.  I also added bits of the silver foil to the ornament along with some glitter. I hung the ornament from another piece of the twisted gold foil and finished with a partial border of green punched boughs.

Supplies: Recycled items: cardboard, candy wrapper, netted fruit bag, Cardstock: Recollections, Bazzill, Martha Stewart Bough Punch, Memento Ink, Scotch Quick Dry Adhesive, Scotch ATG,  Studio G Glitter Glue, Gel Pen.

Tuesday, April 8, 2014

April's Oblong Layers Sketch

It's time for an update over at The Sketch File. Kathy has posted the card I created based on her April Sketch. The sketch is all about oblong or rectangular layers. It was an easy sketch to use and my card came together very quickly once I decided on the color and the orientation (I rotated the sketch). I simply used various pieces of pattern paper scraps that I've been saving and layered them based on the sketch. I stamped the flowers on orange cardstock, trimmed around them, then fringed each petal.  Here's the sketch:

I look forward to seeing what you create with the sketch. Please post it here.